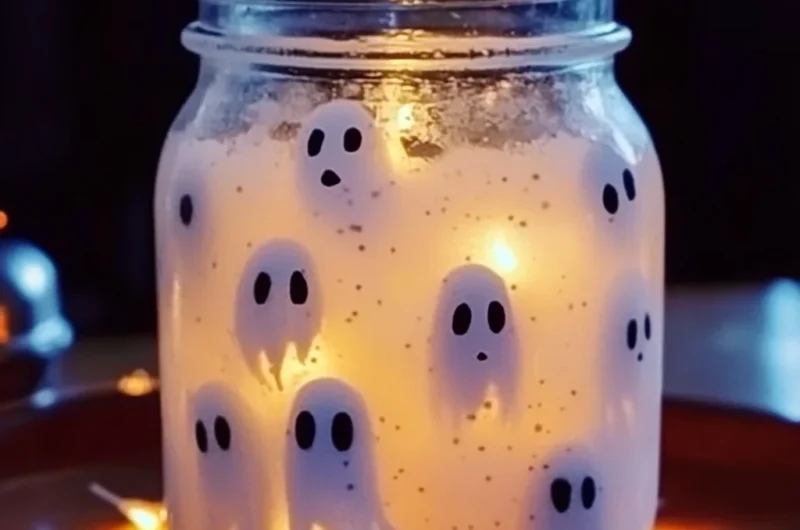
Hey there, fellow creators and Halloween lovers! Are you looking for a little bit of magic to bring into your home this spooky season? I know I am! There’s just something so wonderfully nostalgic about autumn, isn’t there? The crisp air, pumpkin spice everything, and of course, getting ready for Halloween. For me, it’s all about creating those cozy, memorable moments with easy, fun projects. And today, I’ve got a treat for you that’s less about baking and more about enchanting: a Floating Ghost Sensory Jar!
This isn’t just a craft; it’s a little world of wonder you can shake, gaze into, and get lost in. It’s perfect for little hands to help with (under supervision, of course!) and mesmerizing for all ages. Forget complicated spells and potions, because this adorable jar comes together quicker than you can say “boo!” It’s a fantastic way to capture a bit of that Halloween spirit, create a calming sensory experience, or just add a charmingly spooky touch to your decor. Trust me, once you make one, you’ll want to make a whole ghostly fleet!
Why You’ll Love Floating Ghost Sensory Jar
- Fast: You’ll have this enchanting jar ready in minutes!
- Easy: No tricky steps, just simple mixing and assembly.
- Giftable: A handmade sensory jar makes a unique and thoughtful present.
- Crowd-pleasing: Kids and adults alike will be captivated by the floating ghosts!
Ingredients
Gathering your supplies for this project is part of the fun! You probably have some of these lying around already.
- Clear jar or plastic bottle with tight-fitting lid: Any size works, from a small spice jar to a large pickle jar! Just make sure it’s nice and clean, and the lid seals well.
- 1/2 cup clear glue or glitter glue: The secret to that lovely, slow float! Clear glue creates a clearer liquid, while glitter glue adds an extra sparkle right from the start.
- 1 1/2 cups warm water: Warm water helps the glue dissolve more easily.
- White glitter or iridescent glitter: This is where the magic really happens! It mimics mist and moonlight, making your ghosts truly shine.
- Tiny ghost cutouts (foam, sequins, or laminated paper): The stars of our show! You can buy these at craft stores, use Halloween-themed confetti, or even cut out your own small ghost shapes from white foam or paper (laminate paper ones so they don’t disintegrate!).
- A few drops of black or glow-in-the-dark food coloring (optional): Black food coloring gives it a spooky, murky vibe, while glow-in-the-dark adds an extra layer of enchantment after dark!
- Super glue or hot glue: Essential for sealing the lid securely, especially if little hands will be shaking it!
How to Make Floating Ghost Sensory Jar
Let’s get crafting! You’ll be amazed at how quickly this comes together.
- Fill the jar halfway with warm water. Grab your clean jar or bottle and pour in the warm water. This gives us a good base to start mixing.
- Stir in clear glue or glitter glue until fully dissolved. Now, add your glue to the warm water. Give it a good stir with a spoon or a craft stick. You want to make sure the glue is completely dissolved to avoid any clumps and ensure your ghosts float beautifully. Patience is key here!
- Add white or iridescent glitter. Time for sparkle! Sprinkle in your glitter. I love using iridescent glitter because it catches the light so magically. You can add as much or as little as you like – I tend to go a little overboard, because who doesn’t love extra sparkle?
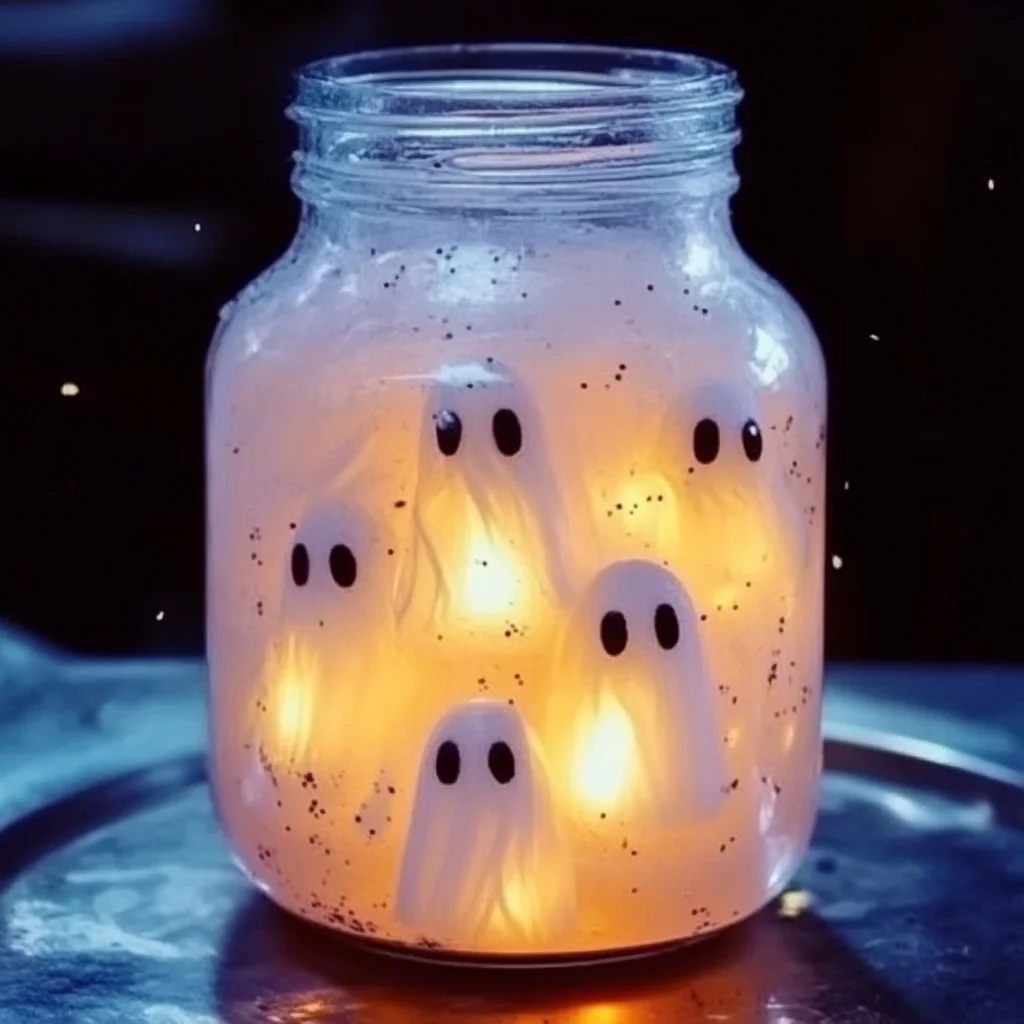
- Drop in the small ghost shapes. Carefully place your tiny ghosts into the mixture. Watch them float and swirl! This is when it really starts to feel like Halloween.
- (Optional) Add a few drops of black or glow-in-the-dark food coloring. If you want a moodier, spookier look, add a drop or two of black food coloring. For a truly ethereal experience, try glow-in-the-dark food coloring – it’ll make your jar come alive when the lights go out! I recently discovered how much fun making other glow-in-the-dark ghost jars can be, and it truly elevates the magic!
- Fill the jar to the top with water, leaving a small air space. Slowly add more warm water until the jar is almost full. You want to leave just a tiny bit of air at the very top. This air pocket gives your ghosts room to “swim” and makes for a more satisfying shake!
- Seal the lid tightly with hot glue or super glue. This step is super important, especially if your jar is for kids! Apply a bead of hot glue or a thin line of super glue around the inside rim of the lid, then screw it on tightly. Let it dry completely. Once it’s sealed, you can shake, rattle, and roll without any worries!
Substitutions & Additions
Get creative with your ghost jars! The possibilities are endless.
- Different Glue Types: If you don’t have clear glue, white school glue can work, but it will make the liquid cloudy. For an even slower “fall” for your ghosts, add a teaspoon of glycerin along with your glue.
- Glitter Galore: Experiment with different colors of glitter! Silver, black, or even purple glitter can add a unique spooky touch. You could even use some fine iridescent shredded cellophane for an extra ethereal shimmer.
- Beyond Ghosts: Why stick to just ghosts? Try tiny bat cutouts, mini pumpkin sequins, or even little spiders for a different Halloween theme.
- Bottle Shapes: Use different shaped jars or bottles for varied effects. A tall, skinny bottle will have ghosts floating down a longer path, while a rounder jar offers more swirling space.
- Outer Decorations: Once your jar is sealed, decorate the outside! Tie a black or orange ribbon around the neck, add googly eyes to the jar itself, or even paint spooky silhouettes on the glass.
- Theme it Up: Instead of just ghosts, imagine a “witch’s brew” jar with green food coloring, black glitter, and tiny cauldron charms. Or a “monster mash” jar with various monster-themed sequins! If you’re looking for another spooky creation to pair with your jar, why not whip up a spooky Hocus Pocus punch?
Tips for Success
To make sure your Floating Ghost Sensory Jar is a hauntingly good success, keep these pointers in mind!
- Dissolve that Glue: Seriously, take your time with step 2. Undissolved glue can lead to stringy bits in your jar, which isn’t the magical effect we’re going for!
- Warm Water Helps: Using warm (not hot!) water really does make dissolving the glue a breeze.
- Don’t Overfill: That little bit of air space is crucial for movement. If you fill it to the absolute brim, your ghosts might just sit there, which is not very fun!
- Secure the Lid: I can’t stress this enough, especially if kids are involved. A good seal prevents leaks and messes, keeping the magic safely inside.
- Shake Gently First: Give it a gentle shake after it’s sealed to see how the ghosts move. If they fall too fast, you might need a little more glue. If they barely move, you might have added too much glue initially, or need to thin it slightly with a tiny bit more water (but be careful not to dilute too much!).
- Supervise Little Ones: While making the jar is fun, always supervise children, especially with the use of glue and when handling glass.
How to Store Floating Ghost Sensory Jar
Your Floating Ghost Sensory Jar is pretty low maintenance once it’s made!
- Keep it Sealed: The tight seal is key not just for preventing spills but also for keeping the contents fresh and preventing evaporation.
- Away from Extremes: Store your jar away from direct sunlight and extreme temperatures (very hot or very cold). This helps maintain the integrity of the glue mixture and can prevent algae growth (though unlikely in a sealed jar).
- Shelf Life: With a properly sealed lid and clean ingredients, your sensory jar can last for months, even up to a year or more! If you notice any discoloration or cloudiness over time that isn’t from the glitter, it might be time to refresh it, but that’s rare.
FAQs
Got questions about your ghostly creation? I’ve got answers!
Can I use any type of food coloring?
Yes, most liquid food colorings will work just fine! Just remember that a little goes a long way, especially for darker colors. For something truly mesmerizing, you could even explore other vibrant sensory experiments to pair with your ghost jars.
What if my ghosts stick to the bottom or float to the top?
If your ghosts stick to the bottom, your glue mixture might be too thick. If they float to the top, it might be too thin. You can try adjusting by adding a tiny bit more warm water (if too thick) or a little more clear glue (if too thin) after pouring out a small amount of the liquid, then reseal and test.
Is this sensory jar safe for toddlers?
Once sealed properly with super glue or hot glue, it’s generally safe for toddlers to observe and shake. However, always supervise young children to ensure they don’t try to open or break the jar. If you’re concerned about glass, use a plastic bottle!
Can I reuse the jar for another project?
Once you’ve sealed the lid with strong glue, it’s pretty permanent! This jar is meant to be a long-lasting sensory item. If you want to make something reusable, skip the strong adhesive and just use a twist-on lid, but be aware it won’t be spill-proof.
I hope you and your family have the best time creating these magical Floating Ghost Sensory Jars! They’re such a simple way to add a bit of spooky charm and a calming, engaging activity to your autumn days. Happy haunting!
For more hauntingly good ideas and delicious recipes, be sure to follow us on Pinterest!