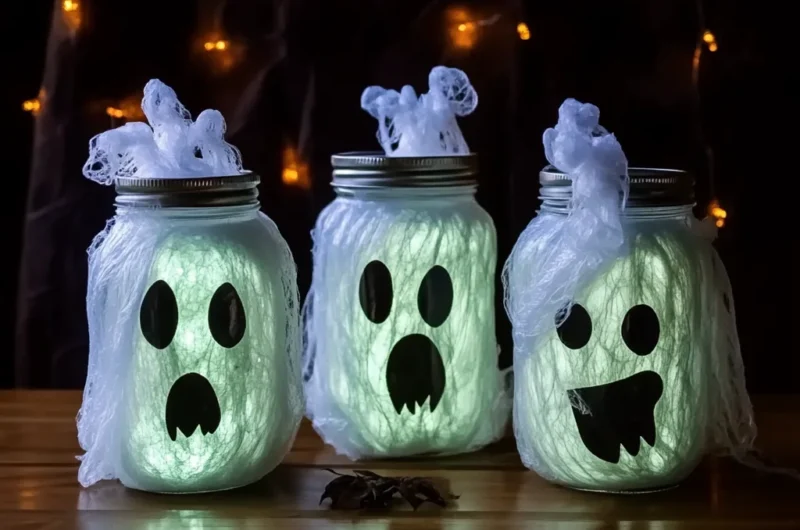
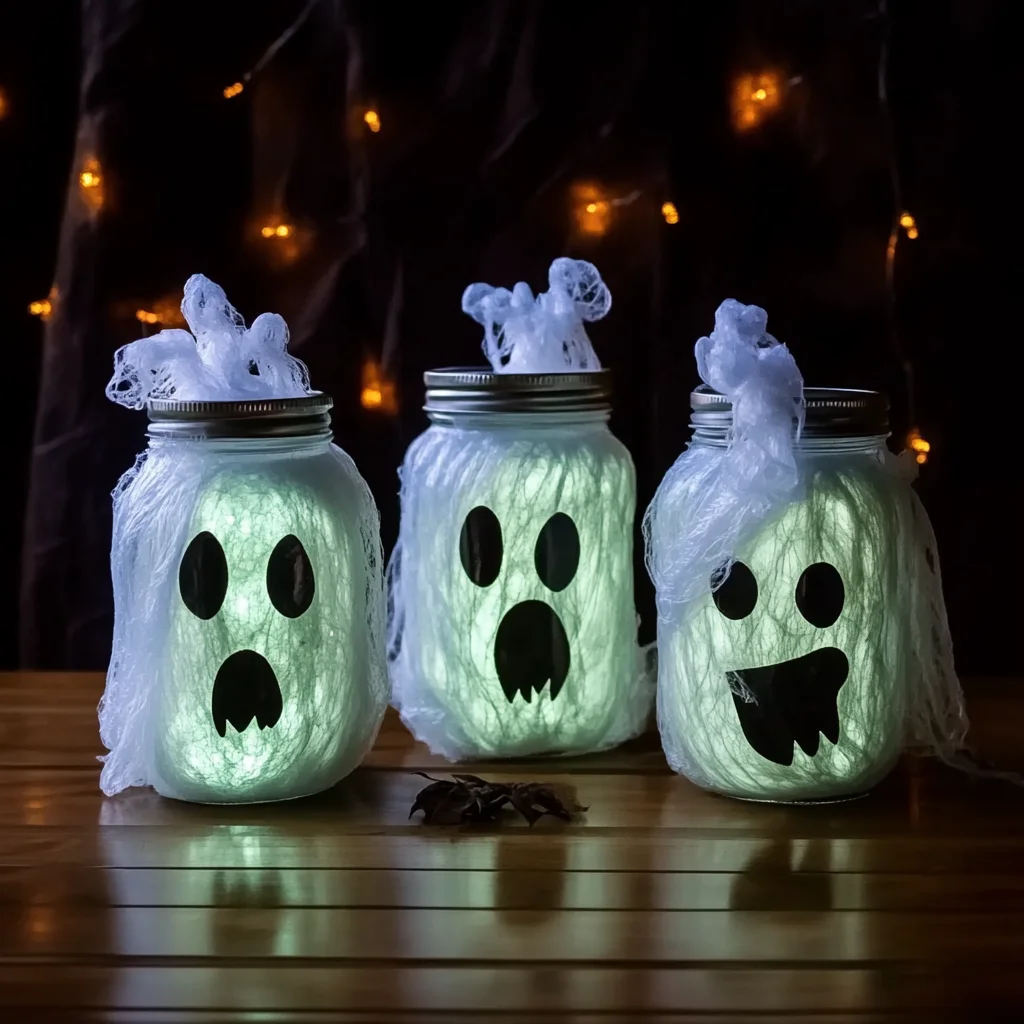
Remember those crisp autumn evenings, the air buzzing with excitement as Halloween drew near? There’s something truly magical about transforming your home into a whimsical, slightly spooky wonderland. And you know what? It doesn’t have to be complicated or time-consuming! Today, I’m sharing one of my absolute favorite, ridiculously easy, and utterly charming DIY projects: Glow-in-the-Dark Ghost Jars. These little guys are not just decorations; they’re tiny beacons of Halloween joy, perfect for adding a cozy, ethereal glow to your porch, mantel, or kids’ rooms. You’ll be amazed at how quickly you can bring these friendly spirits to life, creating memorable decor without any fuss!
Why You’ll Love DIY Glow-in-the-Dark Ghost Jars
- Fast
- Easy
- Giftable
- Crowd-pleasing
Ingredients
Gathering your supplies for these spooky-cute jars is a breeze! Chances are, you might already have most of these tucked away in your craft bin.
- Empty glass jars: Mason jars, old jam jars, pickle jars – any clean, empty glass jar will do! The different sizes add character.
- White tissue paper or gauze: This is what gives our ghosts their ethereal, floaty look. Gauze gives a more tattered, spooky vibe, while tissue paper is softer.
- Glow-in-the-dark paint (or glow spray): The star of the show! Make sure it’s suitable for glass. You can find this at most craft stores.
- Foam brush: Perfect for smooth, even coats of paint.
- Black construction paper: For cutting out those expressive ghost eyes and mouths.
- Scissors: For snipping paper and gauze.
- Glue or Mod Podge: To secure everything in place. Mod Podge also acts as a sealant and can give a nice finish.
How to Make DIY Glow-in-the-Dark Ghost Jars
Let’s get crafting! You’ll be surprised at how quickly these come together, leaving you more time to enjoy the spooky season.
- Prep Your Jars: First things first, grab those empty glass jars you’ve been saving! Give them a good wash with soap and water, then dry them thoroughly. Any moisture can make your paint streaky or prevent it from adhering properly.
- Apply the Glow: This is where the magic really starts to happen! Using your foam brush, apply 2-3 coats of glow-in-the-dark paint to the exterior of each jar. The key here is patience – ensure each coat dries completely before you apply the next. This layered approach is crucial for achieving that bright, optimal luminosity when the lights go out. I usually wait about 20-30 minutes between coats, but always check the paint manufacturer’s instructions!
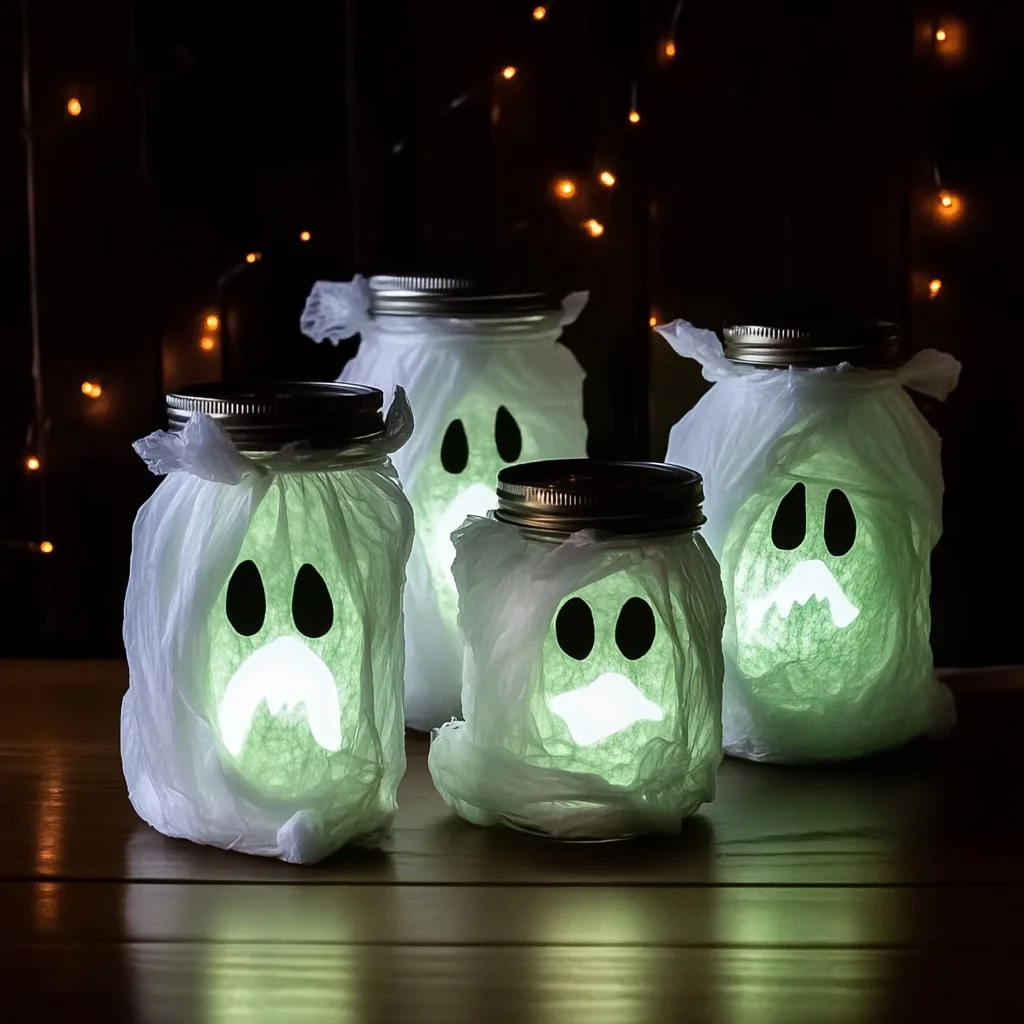
- Give Them Ghostly Attire: Once your painted jars are fully dry and ready to glow beautifully, it’s time to give them their ghostly attire. Carefully wrap each jar with white tissue paper or gauze. You can drape it loosely for a wispy look or wrap it more snugly. Secure the ends and any loose bits with a little glue or Mod Podge. Don’t worry about perfection; a slightly imperfect wrap adds to their charm!
- Craft Their Faces: Now for the fun part – giving your ghosts some personality! Take your black construction paper and cut out various shapes for eyes and mouths. Think classic ovals, mischievous triangles, or even spooky squiggles. Use a dab of glue to affix these features to the tissue-covered jars. This is where your creativity truly shines; no two ghosts have to be alike!
- Activate the Glow: And just like that, you’ve created your very own glowing spirits! To make them glow, simply place the finished jars under a bright light source for several minutes. A sunny window, a desk lamp, or even a flashlight works wonders. Then, turn off the lights and watch your adorable ghost jars come to life with a captivating, soft glow! If you’re looking for more Halloween inspiration, you might love whipping up some spooky Oreo Eyeball Truffles or a vibrant Easy Hocus Pocus Punch to complete your eerie festivities.
Substitutions & Additions
Feel free to get creative and make these ghost jars uniquely yours!
- Jars: If glass jars aren’t available or you’re crafting with very young children, clear plastic containers can work in a pinch. Just be sure the glow paint adheres well.
- Ghostly Drape: Instead of tissue paper or gauze, you could use cheesecloth for a more ethereal, flowing look. Old white fabric scraps or even cotton balls stretched thin could also create an interesting texture.
- Faces: No black construction paper? No problem! Use a black permanent marker directly on the tissue paper (once dry) or even stick on some googly eyes for an extra dose of cuteness.
- Light Source: For a continuous glow, you can carefully place a small, battery-operated LED tea light inside the finished jar. This is especially great if you want them to shine brightly all night without needing to “recharge” the paint.
- Embellishments: Add some sparkle by sprinkling fine glitter onto the wet glue when attaching the tissue paper. You could also tie festive ribbons or twine around the neck of the jar for an extra touch of charm. And for other fun illuminated crafts, check out how to make DIY Light-Up Scarecrow Mason Jars!
Tips for Success
Making these ghost jars is super straightforward, but a few little pointers can ensure your project goes off without a hitch!
- Multiple Paint Coats are Key: Don’t skimp on the glow paint! Applying 2-3 thin, even coats, allowing each to dry completely, will give you the brightest, most impressive glow. A single thick coat might look good initially but often won’t glow as strongly.
- Patience with Drying: Resist the urge to rush. If you try to wrap your jars before the paint is fully dry, it can smudge or peel off, and we don’t want sad, splotchy ghosts!
- Charge Them Up: Remember, glow-in-the-dark paint needs to “charge” under a light source. The brighter and longer the charge, the longer and brighter the glow will be. I like to leave mine near a lamp for at least 15-30 minutes before showing them off.
- Craft with Kids: This is a fantastic project for kids of all ages! Just supervise younger children with scissors and glue. They’ll love seeing their spooky creations come to life.
How to Store DIY Glow-in-the-Dark Ghost Jars
These ghost jars are quite durable and will last for many Halloweens to come if stored properly!
Once the spooky season is over, gently wipe them down if needed (avoid harsh scrubbing, especially on the tissue paper). I usually wrap each jar individually in tissue paper or newspaper and place them in a sturdy box. Store the box in a cool, dry place like a closet, attic, or basement. Since they’re mostly made of glass and paper, moisture is their biggest enemy, so keep them away from damp areas to prevent mildew or damage to the paper. The glow paint itself won’t degrade over time, so they’ll be ready to light up your next autumn season!
FAQs
- Q: How long do the ghost jars typically glow?
A: The duration of the glow depends on the quality of your glow-in-the-dark paint and how long and intensely it was charged. Most paints will glow brightly for 20-60 minutes after a good charge, then fade into a softer ambient glow for several hours. - Q: Can I use different colored glow paint?
A: Absolutely! While white is classic for ghosts, you could experiment with green, blue, or even purple glow paint for a different eerie effect. Just ensure the tissue paper isn’t too thick to obscure the colored glow. - Q: Are these safe to leave outside?
A: They can be placed outdoors for short periods, especially on a covered porch, but I wouldn’t recommend leaving them exposed to rain or strong winds. The tissue paper and glue aren’t weatherproof and could be damaged. - Q: What if my glow paint isn’t glowing very well?
A: Make sure you’ve applied enough coats (2-3 recommended) and allowed each to dry fully. Also, ensure you’re charging them under a very bright light source for a sufficient amount of time (at least 15-30 minutes). Sometimes, older paint can lose some potency, so check the expiration if it’s been in your stash for a while!
For more spooktacular ideas and delicious recipes, be sure to follow us on Pinterest!
Glow-in-the-Dark Ghost Jars
Ingredients
Equipment
Method
- Step 1: Prep Your Jars: Give empty glass jars a good wash with soap and water, then dry them thoroughly to prevent streaky paint or poor adhesion.
- Step 2: Apply the Glow: Using a foam brush, apply 2-3 thin, even coats of glow-in-the-dark paint to the exterior of each jar. Ensure each coat dries completely (20-30 minutes, or per manufacturer's instructions) before applying the next, as this layering is crucial for optimal luminosity.
- Step 3: Give Them Ghostly Attire: Once the painted jars are fully dry, carefully wrap each jar with white tissue paper or gauze, draping it loosely for a wispy look or more snugly. Secure the ends and loose bits with glue or Mod Podge; imperfections add charm.
- Step 4: Craft Their Faces: Cut various shapes for eyes and mouths (ovals, triangles, squiggles) from black construction paper. Use a dab of glue to affix these features to the tissue-covered jars, allowing for unique personalities for each ghost.
- Step 5: Activate the Glow: Place the finished jars under a bright light source (sunny window, desk lamp, flashlight) for several minutes (at least 15-30 minutes recommended for a strong charge). Then, turn off the lights to watch your ghost jars come to life with a captivating, soft glow!