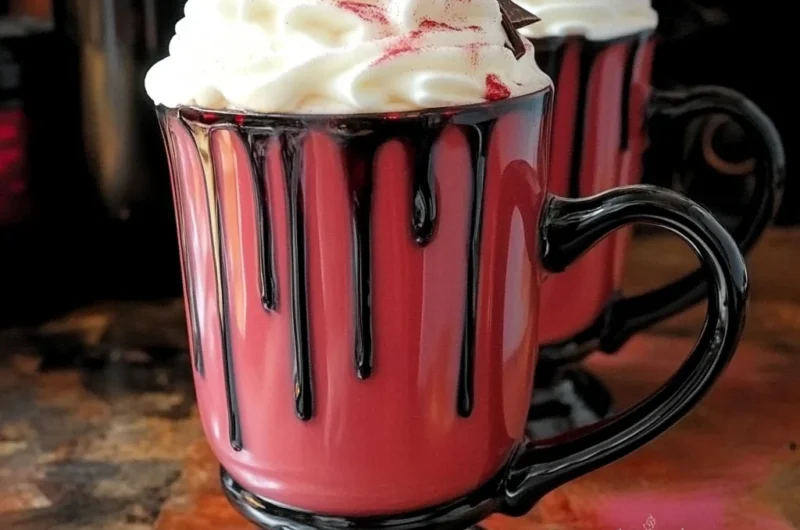
Hey there, fellow foodies and spooky season enthusiasts! As the leaves turn crunchy and the air gets that crisp, exciting chill, there’s nothing I love more than a warm, comforting drink to cozy up with. But what if that drink could be spook-tacular too? I remember thinking as a kid how cool it would be to have a truly magical potion. Well, friends, get ready because this Vampire Hot Chocolate isn’t just a drink; it’s an experience! It’s surprisingly easy to whip up, quick enough for a weeknight treat, and it leaves a lasting impression – perfect for any ghoulish gathering or just a fun family night in. You’re going to love how simple it is to transform classic hot chocolate into something truly extraordinary and memorable. If you love cozy drinks, you might also enjoy a comforting mug of Cozy Creamy Tortellini Soup for dinner beforehand!
Why You’ll Love Vampire Hot Chocolate
- Fast: You can whip up this spooky treat in under 30 minutes, perfect for last-minute fun!
- Easy: No complicated steps or fancy equipment needed, just simple ingredients and a little magic.
- Giftable: Pour cooled hot chocolate into charming jars for a unique, spooky hostess gift (minus the sugar blood rim for easy transport!).
- Crowd-pleasing: Both kids and adults will adore this fun, festive, and deliciously creamy drink.
Ingredients
Gather your ghoulish goodies! Here’s what you’ll need to create this fang-tastic beverage:
- For the Vampire Hot Chocolate:
- 3 cups Whole Milk: The rich, creamy foundation for our enchanting drink. Whole milk truly makes it decadent!
- 1 cup Heavy Cream: Adds an extra layer of velvety smoothness and indulgence. This is where a lot of the magic happens!
- 1 teaspoon Vanilla Extract: A classic flavor enhancer that brightens up the sweetness of the chocolate.
- 8 ounces White Chocolate, chopped: This is key for creating that vibrant, “bloody” color. Chopping it helps it melt seamlessly.
- 1/2 cup Mini Chocolate Chips: For an extra boost of chocolatey goodness and a delightful texture in every sip.
- Red Food Coloring: The secret to our hot chocolate’s iconic, spooky hue! Gel food coloring works best for intense color without watering down the drink.
- For the Whipped Cream:
- 1 cup Heavy Whipping Cream: To create fluffy, homemade whipped cream that’s miles better than anything from a can.
- 1 teaspoon Vanilla Extract: For a subtle, sweet fragrance and flavor in your topping.
- 1 tablespoon Granulated Sugar: Just enough to sweeten the whipped cream without making it overly rich.
- For the Sugar Blood:
- 1/2 cup Light Corn Syrup: Helps prevent crystallization and gives that perfect, eerily drippy consistency.
- 1/2 cup Water: Essential for dissolving the sugar and creating the syrup base.
- 1 cup Granulated Sugar: The main component for our show-stopping, edible “blood.”
- Red Gel Food Coloring: Crucial for achieving a deep, realistic blood red for that ultimate vampire effect.
How to Make Vampire Hot Chocolate
Let’s get brewing! Follow these simple steps, and you’ll have a mug of spooky delight in no time.
For the Whipped Cream:
- First things first, let’s get that dreamy whipped cream ready. In the clean bowl of your stand mixer (or a large bowl with a hand mixer), combine 1 cup heavy whipping cream, vanilla extract, and granulated sugar.
- Whip on medium-high speed until you see lovely, stiff peaks form. This usually takes a few minutes – keep an eye on it so you don’t over-whip! Pop it in the fridge while you make the hot chocolate.
For the Vampire Hot Chocolate:
- Grab a medium saucepan and pour in your whole milk and heavy cream. Add the vanilla extract, your chopped white chocolate, and those adorable mini chocolate chips.
- Heat this delicious mixture over medium-low heat. Make sure to stir it occasionally. You’re looking for the chocolate to melt completely and for the mixture to just begin to simmer – do not let it boil! Gentle heat is key here.
- Once everything is smooth and warm, it’s time for the magic! Stir in just one or two drops of red food coloring. Start with a little, you can always add more to get that perfect “blood-red” shade. I always err on the side of caution because a little goes a long way!
- Pour your gorgeous, crimson hot chocolate into your prepared mugs.
For the Sugar Blood:
- Now for the show-stopping “sugar blood” rim! In a small, clean saucepan, combine your water and light corn syrup. Add the granulated sugar and give it a good stir until it’s combined.
- Heat this mixture over medium heat. This is important: do not stir once it starts heating up. You’ll absolutely need a candy thermometer here. Heat it until the sugar mixture reaches exactly 300°F (150°C). This is the hard crack stage, so please be careful – melted sugar is extremely hot!
- Once it hits 300°F, immediately remove it from the heat and stir in your red gel food coloring. Be quick but careful, as it’s very hot and will set fast!
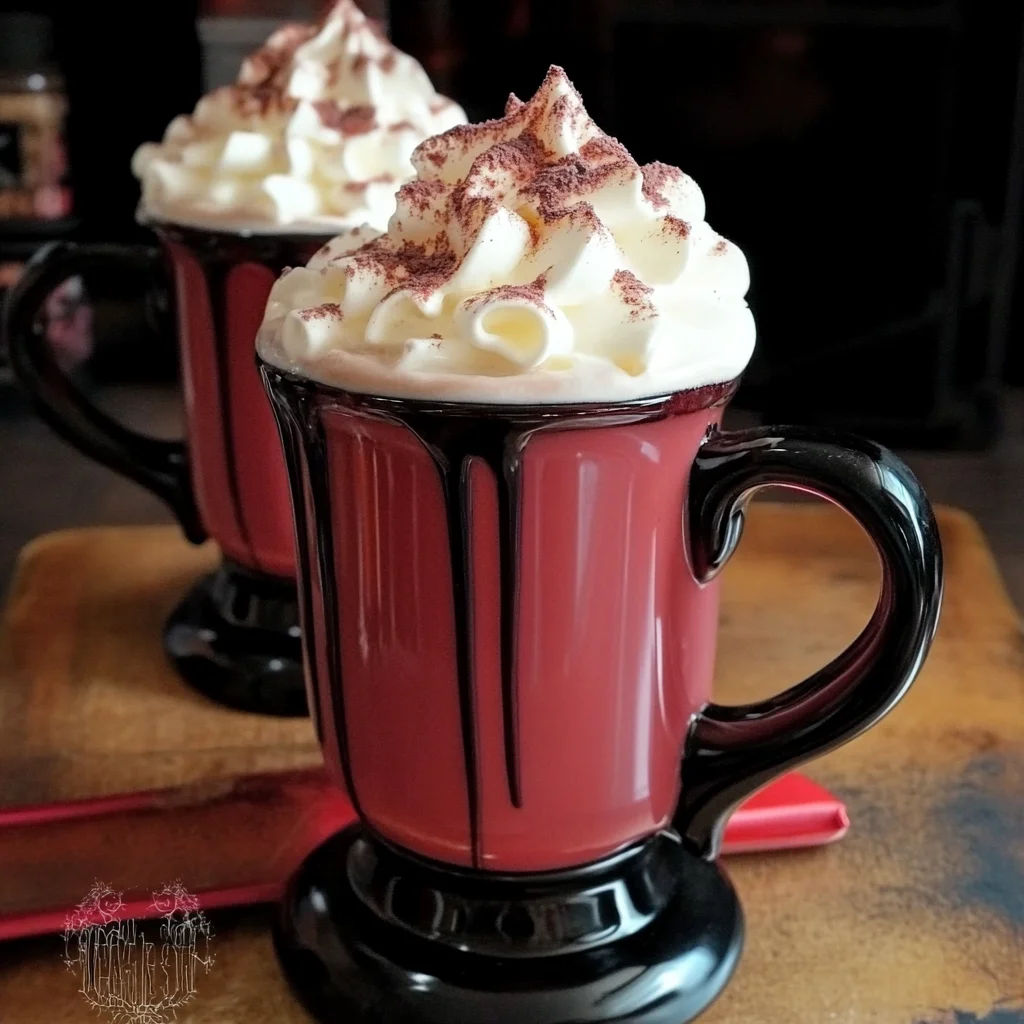
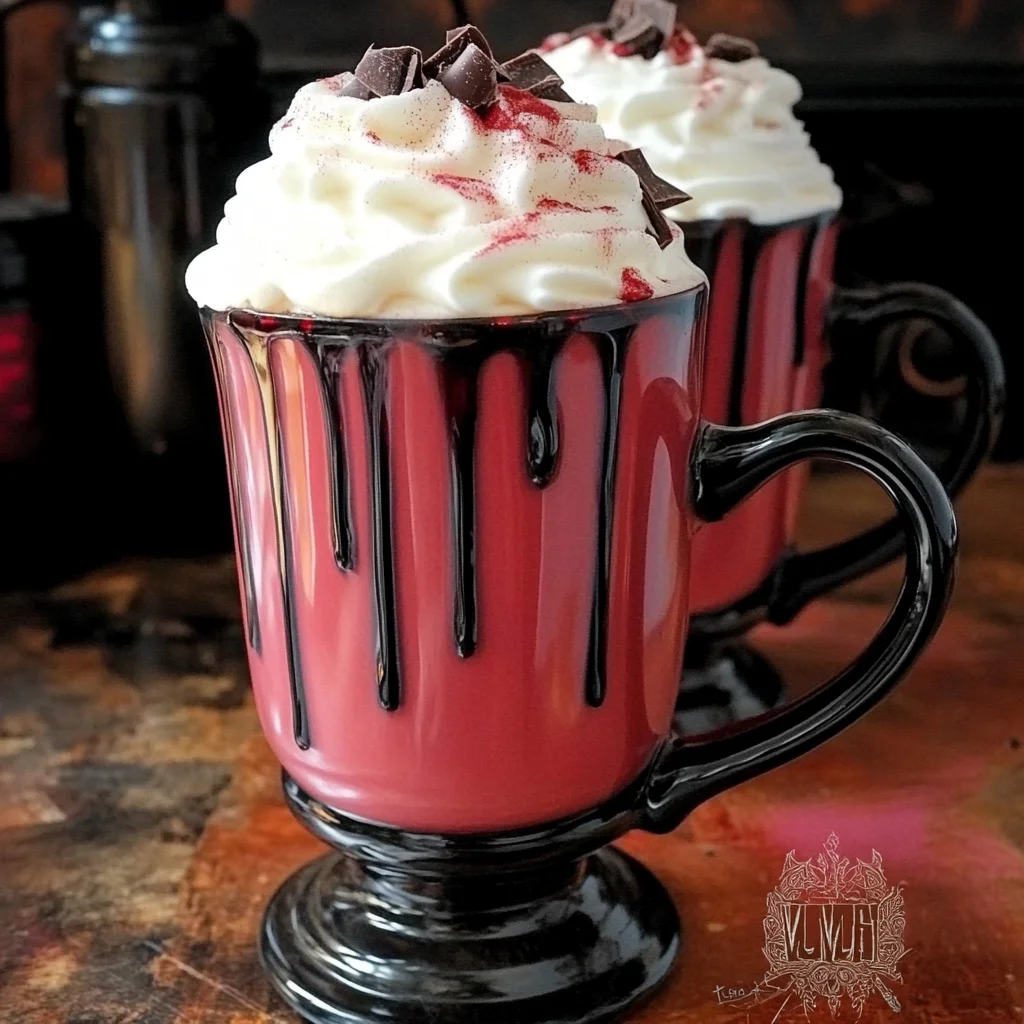
- Allow the sugar blood to cool for just a moment – it needs to be cool enough to handle but still liquid and dippable. Then, carefully dip the rim of your clean glasses into the sugar mixture.
- Dip to coat, then immediately place the glass upright on a piece of parchment paper or a cooling rack. This allows the sugar blood to drip down the sides as it hardens, creating that wonderfully eerie effect. Let it set completely before pouring in your hot chocolate and topping with that fluffy whipped cream!
Substitutions & Additions
Want to get even more creative with your Vampire Hot Chocolate? Here are a few ideas to customize your spooky sip:
- Milk Alternatives: While whole milk and heavy cream create the ultimate richness, you can experiment with dairy-free milks like almond or oat milk for a lighter version. Just know the texture might be a little different.
- Chocolate Choices: If white chocolate isn’t your jam, you could use a mix of white and a tiny bit of semi-sweet chocolate for a deeper, moodier flavor, though it might affect the vibrant red color.
- Spices: Add a pinch of cinnamon or a tiny dash of chili powder for a warming, Mexican hot chocolate twist.
- Extra Spooky Toppings: Beyond whipped cream, think about adding mini marshmallows, chocolate syrup drizzles, or even some edible glitter. For a truly ghoulish touch, consider making some spooky Oreo Eyeball Truffles to serve alongside your mugs!
- Adult Version: For the grown-ups, a shot of raspberry liqueur, cherry brandy, or even a splash of spiced rum would make this a truly “spirited” treat.
- Flavor Boosts: A drop of peppermint extract or almond extract could add another layer of flavor if you’re feeling adventurous.
Tips for Success
- Don’t Rush the Chocolate Melt: Keep the heat on medium-low for the hot chocolate mixture. High heat can scorch the milk or cause the white chocolate to seize and become grainy. Patience is key for a smooth drink!
- Candy Thermometer is Your Best Friend: For the sugar blood, a reliable candy thermometer is non-negotiable. Reaching exactly 300°F is crucial for the “hard crack” stage, ensuring your blood drips and hardens perfectly.
- Red Gel Food Coloring: For both the hot chocolate and the sugar blood, gel food coloring provides a much more vibrant and concentrated color than liquid food coloring. It also won’t thin out your mixture, preserving that rich texture.
- Prep Ahead: You can make the hot chocolate base ahead of time and store it in the fridge. Reheat gently on the stove when you’re ready to serve. The whipped cream can also be made a few hours in advance and stored chilled. The sugar blood, however, is best made and applied just before serving for the freshest drips.
- Practice Makes Perfect: If you’re nervous about the sugar blood, try a practice run on a spare glass. It sets quickly, so you’ll get the hang of dipping and dripping with a little practice!
How to Store Vampire Hot Chocolate
If you happen to have any leftover Vampire Hot Chocolate (which I doubt, it’s so good!), here’s how to keep it fresh:
- Hot Chocolate Base: Store the cooled hot chocolate base in an airtight container in the refrigerator for up to 3-4 days. When ready to serve again, gently reheat on the stove over low heat, stirring frequently, until warmed through. You might need to add a splash of milk to loosen it up.
- Whipped Cream: Homemade whipped cream is best enjoyed fresh, but it can be stored in an airtight container in the fridge for up to 24 hours. It might lose a little of its stiffness, but it will still be delicious.
- Sugar Blood Rims: Once the sugar blood has hardened on the mugs, they can be stored at room temperature, uncovered, for a day or two. Humidity is their enemy, so avoid sealing them in containers, as this can make the sugar sticky.
FAQs
- What if I don’t have a candy thermometer for the sugar blood?
- Unfortunately, a candy thermometer is pretty essential for the sugar blood to ensure it reaches the hard crack stage (300°F). Without it, it’s very difficult to get the right consistency for it to harden and drip properly. It’s a worthwhile investment if you plan on doing more candy-making!
- Can I make this dairy-free?
- Yes, you can! Use dairy-free milk (like oat or almond milk) and a plant-based heavy cream alternative. For the white chocolate, make sure to choose a high-quality dairy-free white chocolate. The sugar blood is naturally dairy-free.
- Is this recipe good for kids?
- Absolutely! This is a fantastic, kid-friendly treat that they’ll get a kick out of, especially around Halloween. Just make sure to handle the hot sugar blood for them. For another fun spooky drink, you might also like our Easy Hocus Pocus Punch!
For more spook-tacular recipes, cozy comfort food, and everyday meal inspiration, be sure to follow us on Pinterest!
Vampire Hot Chocolate
Ingredients
Equipment
Method
- For the Whipped Cream: In the clean bowl of your stand mixer (or a large bowl with a hand mixer), combine 1 cup heavy whipping cream, vanilla extract, and granulated sugar.
- Whip on medium-high speed until you see lovely, stiff peaks form. This usually takes a few minutes – keep an eye on it so you don't over-whip! Pop it in the fridge while you make the hot chocolate.
- For the Vampire Hot Chocolate: Grab a medium saucepan and pour in your whole milk and heavy cream. Add the vanilla extract, your chopped white chocolate, and those adorable mini chocolate chips.
- Heat this delicious mixture over medium-low heat. Make sure to stir it occasionally. You’re looking for the chocolate to melt completely and for the mixture to just begin to simmer – do not let it boil! Gentle heat is key here.
- Once everything is smooth and warm, it’s time for the magic! Stir in just one or two drops of red gel food coloring. Start with a little, you can always add more to get that perfect "blood-red" shade. I always err on the side of caution because a little goes a long way!
- Pour your gorgeous, crimson hot chocolate into your prepared mugs.
- For the Sugar Blood: Now for the show-stopping "sugar blood" rim! In a small, clean saucepan, combine your water and light corn syrup. Add the granulated sugar and give it a good stir until it's combined.
- Heat this mixture over medium heat. This is important: do not stir once it starts heating up. You’ll absolutely need a candy thermometer here. Heat it until the sugar mixture reaches exactly 300°F (150°C). This is the hard crack stage, so please be careful – melted sugar is extremely hot!
- Once it hits 300°F, immediately remove it from the heat and stir in your red gel food coloring. Be quick but careful, as it's very hot and will set fast!
- Allow the sugar blood to cool for just a moment – it needs to be cool enough to handle but still liquid and dippable. Then, carefully dip the rim of your clean glasses into the sugar mixture.
- Dip to coat, then immediately place the glass upright on a piece of parchment paper or a cooling rack. This allows the sugar blood to drip down the sides as it hardens, creating that wonderfully eerie effect. Let it set completely before pouring in your hot chocolate and topping with that fluffy whipped cream! Serve immediately.