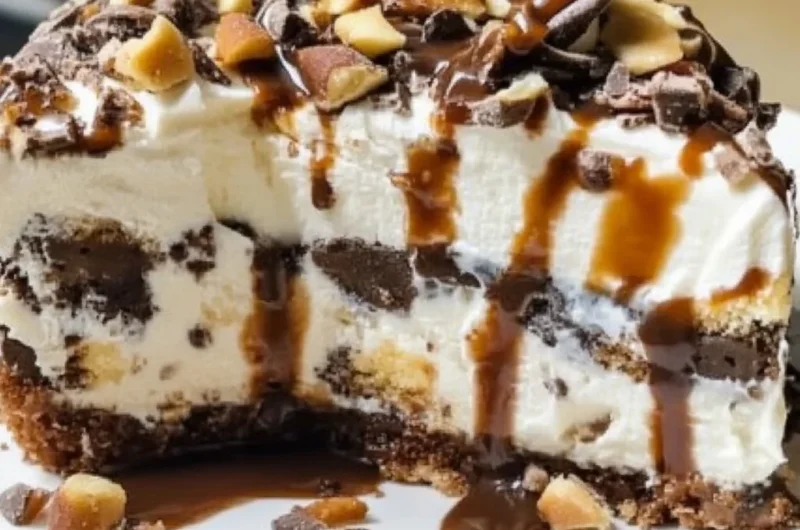
Hey there, sweet friends! Do you ever just crave a dessert that feels incredibly decadent, yet practically makes itself? Something that brings back those warm, fuzzy feelings of grandma’s kitchen, but without all the fuss? Well, get ready, because today I’m sharing a recipe that’s about to become your new best friend: Turtle Lush! This isn’t just a dessert; it’s a hug in a dish, a symphony of chocolate, caramel, and pecan goodness layered to perfection. And the best part? It’s completely no-bake! That’s right, no oven required, making it ideal for any time of year, especially when you want something spectacular without breaking a sweat. It’s so quick, so easy, and so unbelievably memorable, you’ll wonder where it’s been all your life.
Why You’ll Love Turtle Lush
- Fast: Seriously speedy prep for a multi-layered dessert.
- Easy: No baking, simple steps, perfect for beginners.
- Giftable: Makes a stunning presentation, great for potlucks or hostess gifts.
- Crowd-pleasing: Who can resist chocolate, caramel, and pecans?
Ingredients
Gather your simple ingredients, and let’s get ready to layer up some magic!
- 3 cups Oreo crumbs: The base of our dream crust! You can buy them pre-crushed or easily make your own by pulsing whole Oreos in a food processor.
- 8 tablespoons unsalted butter, melted: Binds those Oreo crumbs together into a perfect, buttery foundation.
- 1 (8-ounce) package cream cheese, softened: The heart of our creamy, tangy layer. Make sure it’s good and soft for a lump-free mix!
- 1/2 cup powdered sugar: Sweetens the cream cheese layer to pure bliss.
- 16 ounces thawed whipped topping, divided: Our secret weapon for airy, light layers. Cool Whip works wonderfully here!
- 1 (5.9-ounce) box instant chocolate pudding mix: The quickest way to rich, chocolatey goodness. Any brand will do!
- 3 cups cold milk: Essential for setting that instant pudding perfectly.
- 1 cup chopped pecans, divided: Adds that signature turtle crunch and nutty flavor.
- 1/2 cup caramel sauce: Drizzly, dreamy caramel is a must! Store-bought or homemade works.
- 1/4 cup chocolate syrup: An extra touch of chocolatey decadence for the top.
How to Make Turtle Lush
Let’s walk through these super simple steps together. You’ve got this!
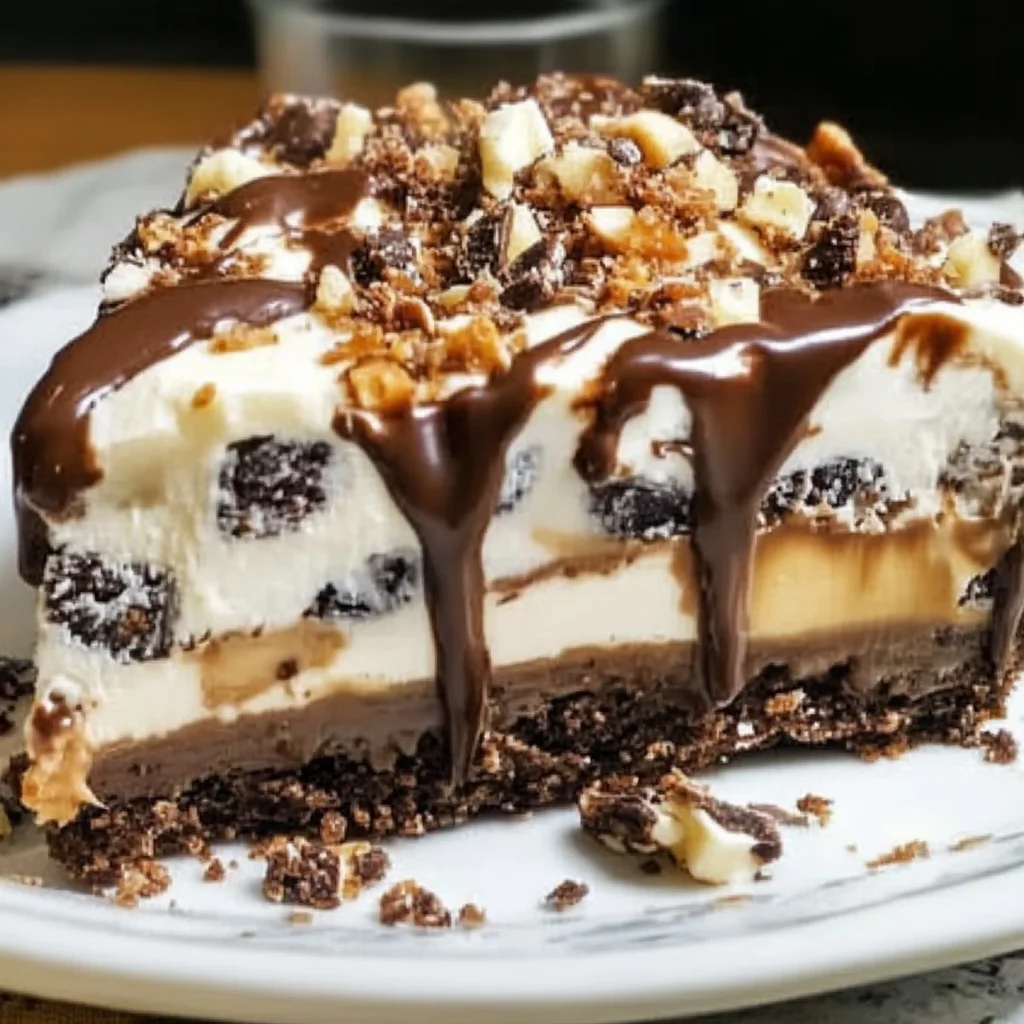
- Start with the Crust: Grab a medium bowl and combine your Oreo crumbs with the melted butter. Give it a good stir until every crumb is coated. Now, press this mixture firmly and evenly into the bottom of your 9×13-inch dish to form the crust. This is your foundation for greatness!
- Whip up the Cream Cheese Layer: In a large bowl, beat your softened cream cheese and powdered sugar together until it’s wonderfully smooth and creamy. No lumps allowed!
- Fold in the Fluff & Crunch: Gently fold in half of that lovely thawed whipped topping and half of your chopped pecans into the cream cheese mixture. This makes it light and adds that crucial pecan texture.
- Spread the Creamy Goodness: Carefully spread this cream cheese layer evenly over your Oreo crust. Take your time to get it nice and smooth.
- Prepare the Pudding Layer: In another bowl, whisk the instant chocolate pudding mix with the cold milk for about two minutes. You’ll see it start to thicken right before your eyes – magic!
- Lighten the Pudding: Now, gently fold the remaining whipped topping into the thickened pudding mixture until it’s all beautifully combined. This makes your chocolate layer extra airy and delightful. If you’re looking for other easy, chocolatey dessert ideas, you might also love a simple chocolate dump cake!
- Layer it Up: Spread the pudding mixture evenly over the cream cheese layer in the dish.
- The Drizzle Finale: Get ready for the best part! Drizzle that luscious caramel sauce and chocolate syrup all over the pudding layer. Don’t be shy!
- Pecan Perfection: Sprinkle the remaining chopped pecans generously on top. This is what makes it “turtle” right?
- Chill Out: This step is crucial! Pop your Turtle Lush into the refrigerator for at least 4 hours, but honestly, overnight is even better. This gives all those amazing layers time to set up beautifully and allows the flavors to truly meld into something spectacular.
- Serve & Enjoy: Once perfectly chilled, slice into generous squares and watch those smiles appear!
Substitutions & Additions
Feeling creative? Here are a few ways to make this Turtle Lush truly your own!
- Crust Variations: Not an Oreo fan? You could totally use graham cracker crumbs or even chocolate chip cookie crumbs for the base.
- Nut-Free Option: If pecans aren’t your thing or you have allergies, feel free to omit them, or swap them for crushed pretzels for a sweet and salty crunch!
- Pudding Play: While chocolate is classic, imagine a butterscotch or even a cheesecake flavored instant pudding in here!
- Extra Caramel/Chocolate: For a true caramel lover, you can add more caramel right into the cream cheese layer or the pudding layer.
- Candy Toppings: A sprinkle of mini chocolate chips, toffee bits, or even chopped Snickers bars could take this over the top!
Tips for Success
A few little tricks to ensure your Turtle Lush is absolutely perfect every time!
- Softened Cream Cheese is Key: I can’t stress this enough! If your cream cheese isn’t soft, you’ll end up with lumps, and nobody wants that. Take it out of the fridge at least 30 minutes before you start.
- Don’t Overmix the Pudding: Whisk just until it thickens, usually about 2 minutes. Overmixing can make it too stiff.
- Chilling Time is Non-Negotiable: Seriously, resist the urge to cut into it early! The chilling time allows everything to set properly and prevents a messy, runny dessert. It’s also perfect for making ahead – an easy win for party planning, much like preparing a batch of no-bake brownie batter dip for unexpected guests.
- Even Layers: Take a moment to spread each layer as evenly as possible for the prettiest presentation.
How to Store Turtle Lush
Your Turtle Lush will keep beautifully in the refrigerator for up to 3-4 days, covered tightly with plastic wrap. This dessert actually tastes even better on day two as the flavors have more time to mingle and deepen! I wouldn’t recommend freezing it, as the whipped topping and cream cheese layers can sometimes separate or become watery upon thawing.
FAQs
Got questions? I’ve got answers!
- Q: Can I make Turtle Lush ahead of time?
A: Absolutely! In fact, I highly recommend making it the day before you plan to serve it. This gives it ample time to chill and allows the flavors to truly shine.
- Q: What size dish should I use?
A: A 9×13-inch baking dish is perfect for this recipe, yielding a good number of servings.
- Q: Can I use sugar-free ingredients?
A: Yes, you can! Opt for sugar-free instant pudding mix, sugar-free whipped topping, and sugar-free caramel/chocolate syrups to make a lighter version.
- Q: My cream cheese layer is lumpy! What did I do wrong?
A: Most likely, your cream cheese wasn’t soft enough. Next time, ensure it sits at room temperature for at least 30-60 minutes before mixing for a silky-smooth result.
For more delicious recipe ideas and kitchen inspiration, be sure to follow us on Pinterest!