Oh, friend, there’s just something magical about that first sip of coffee on a crisp morning, isn’t there? Now, imagine that sip infused with the comforting flavors of rich chocolate and refreshing peppermint, all without leaving your cozy kitchen. If you’ve ever dreamt of bottling that festive coffee shop vibe, you’re in for a treat! This homemade peppermint mocha coffee creamer recipe isn’t just easy; it’s a little hug in a mug, perfect for those moments when you want to elevate your daily brew from ordinary to extraordinary. Forget those artificial store-bought versions – we’re making the real deal, and it’s going to fill your home with the most delightful aroma!
I absolutely adore how quickly this comes together, transforming simple ingredients into a truly memorable coffee experience. It’s perfect for holiday mornings, a mid-afternoon pick-me-up, or even as a thoughtful, heartfelt gift. Trust me, once you try this, you’ll wonder how you ever lived without it!
Why You’ll Love Peppermint Mocha Coffee Creamer
- Fast: Whip it up in less than 10 minutes!
- Easy: No fancy equipment or techniques required.
- Giftable: Makes a wonderful homemade present for friends and family.
- Crowd-pleasing: A universally loved flavor combination that everyone will adore.
Ingredients
Gathering your ingredients for this delightful creamer is super straightforward. You probably have most of them already!
- 1 cup Milk (dairy, almond, oat, or preferred alternative): The base of our creamer! Use whatever milk you love and typically have on hand. Dairy milk will give a classic richness, but almond or oat milk work beautifully for a dairy-free option.
- ½ cup Heavy Cream (or full-fat coconut milk for dairy-free): This is where the magic happens, adding that luxurious, creamy texture. Full-fat coconut milk in a can is a fantastic dairy-free substitute that adds richness without a strong coconut flavor, especially when mixed with chocolate.
- 2 tbsp Unsweetened Cocoa Powder: The key to that deep, decadent mocha flavor. Make sure it’s unsweetened so you can control the sweetness level yourself.
- 2-3 tbsp Sweetener (maple syrup, honey, or simple syrup), to taste: You get to choose! Maple syrup adds a lovely warmth, honey brings a delicate floral note, and simple syrup is a neutral choice. Start with 2 tablespoons and add more if you prefer a sweeter creamer.
- 1 tsp Vanilla Extract: A kitchen staple! Vanilla enhances all the other flavors and adds a touch of warmth.
- ¼-½ tsp Peppermint Extract (start with ¼ tsp as it is potent): This is the star of the show! A little goes a long way with peppermint extract, so always start small. You can always add more, but you can’t take it away!
- Pinch of Salt (optional): Just a tiny pinch makes a huge difference, believe it or not! It helps to really bring out the chocolate flavor, making it taste even richer.
How to Make Peppermint Mocha Coffee Creamer
Let’s get cooking! This couldn’t be simpler, I promise. You’ll have a batch of this delicious creamer ready in no time.
- First things first, grab a small saucepan and add your milk, heavy cream (or coconut milk!), unsweetened cocoa powder, and your chosen sweetener.
- Whisk everything together really well over medium heat. You want to stir continuously until all the cocoa powder has dissolved and the mixture is nice and heated through. See those tiny bubbles forming around the edges? That’s perfect! Just be careful not to let it come to a full boil – we’re aiming for warm and melded, not scorched.
- Once it’s beautifully combined and warmed, take that saucepan right off the heat. Now for the flavor finishers! Stir in the vanilla extract, the peppermint extract (remember, start with a quarter teaspoon!), and that optional pinch of salt. Give it another good whisk to ensure everything is evenly distributed.
- Now, for the hardest part: letting it cool! You want the creamer to cool completely before you transfer it. This helps the flavors deepen and ensures it’s at the perfect temperature for storing.
- Once cooled, carefully pour your magnificent creamer into a clean glass jar or bottle. Pop it in the fridge, and it’s ready for your next coffee adventure! Remember to give it a good shake before each use, as some of the cocoa might settle.

Substitutions & Additions
This recipe is wonderfully adaptable, so feel free to make it your own!
- Dairy-Free Delight: As mentioned, full-fat coconut milk is fantastic for that creamy texture without dairy. For a lighter touch, any plant-based milk (almond, oat, soy) works great.
- Sweetener Swaps: Not a fan of maple syrup? Try agave nectar, brown sugar, or even a sugar substitute if you’re watching your intake. Adjust to your personal taste!
- Extra Chocolatey: If you’re a true chocolate fiend, you could stir in a tablespoon of chocolate syrup along with the cocoa powder for an even richer chocolate base.
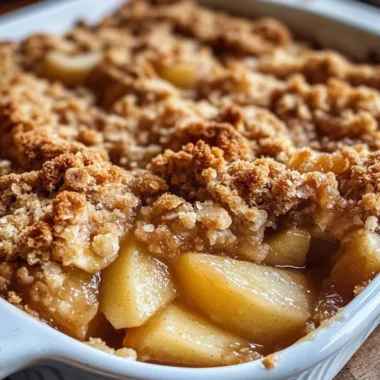
- Spice It Up: Feeling adventurous? A tiny pinch of cinnamon or a dash of almond extract could add another layer of cozy flavor. It could even be a fun twist for a special occasion, much like how a touch of unexpected spice can elevate a classic dessert like homemade apple crumble.
- Minty Freshness: If you love a stronger mint flavor, you can slowly add another eighth of a teaspoon of peppermint extract until it’s just right for you.
Tips for Success
- Don’t Boil! This is key to preventing the milk from scorching or separating. Gentle heat is your friend here.
- Start Small with Peppermint: Seriously, this extract is potent! You can always add more, but you can’t take it away. It’s like finding that perfect balance in a comforting bowl of creamy tortellini soup – you want just enough, not too much!
- Taste and Adjust: Before cooling, give your creamer a little taste. Is it sweet enough? Minty enough? This is your chance to tweak it!
- Prep Ahead: Make a big batch on Sunday, and you’ll have delicious coffee creamer all week long. It makes busy mornings so much brighter.
- Gift Idea: Pour the cooled creamer into a pretty bottle, tie a ribbon around it, and attach a small gift tag with heating instructions. Pair it with a festive mug or a bag of gourmet coffee beans for an extra special present. Imagine gifting this alongside a kit for making vampire hot chocolate for a themed treat!
How to Store Peppermint Mocha Coffee Creamer
Once your creamer is completely cooled, transfer it to an airtight container – a glass jar or bottle works perfectly. Store it in the refrigerator. It will stay fresh and delicious for about 7-10 days, just like regular milk. Always give it a good shake before each use, as some of the cocoa powder might settle at the bottom.
FAQs
Here are a few common questions you might have about this delightful creamer:
Can I make this dairy-free?
Absolutely! Simply swap the dairy milk for your favorite plant-based milk (almond, oat, soy) and use full-fat canned coconut milk instead of heavy cream for that rich, creamy texture.
How long does homemade creamer last?
Stored in an airtight container in the refrigerator, your peppermint mocha creamer will last for 7-10 days. Always check for any off smells or separation before using, just to be safe!
Can I use peppermint candies instead of extract?
While you might be able to melt down candies, I highly recommend using peppermint extract for a more consistent and potent flavor without adding extra sugar or artificial ingredients that candies might contain. Extract gives you better control over the mint intensity.
What else can I use this creamer for?
Beyond coffee, this creamer is fantastic in hot chocolate, added to a milkshake, or even drizzled over ice cream for a festive treat! Get creative!
For more delicious recipes and kitchen inspiration, be sure to follow us on Pinterest!
Homemade Peppermint Mocha Coffee Creamer

Ingredients
Equipment
Method
- Step 1: Grab a small saucepan and add your milk, heavy cream (or coconut milk!), unsweetened cocoa powder, and your chosen sweetener.
- Step 2: Whisk everything together really well over medium heat. Stir continuously until all the cocoa powder has dissolved and the mixture is nice and heated through, with tiny bubbles forming around the edges. Be careful not to let it come to a full boil.
- Step 3: Once beautifully combined and warmed, take the saucepan right off the heat. Stir in the vanilla extract, the peppermint extract (remember, start with a quarter teaspoon!), and that optional pinch of salt. Give it another good whisk to ensure everything is evenly distributed.
- Step 4: Let the creamer cool completely before you transfer it. This helps the flavors deepen and ensures it’s at the perfect temperature for storing.
- Step 5: Once cooled, carefully pour your magnificent creamer into a clean glass jar or bottle. Pop it in the fridge, and it’s ready for your next coffee adventure! Remember to give it a good shake before each use, as some of the cocoa might settle.