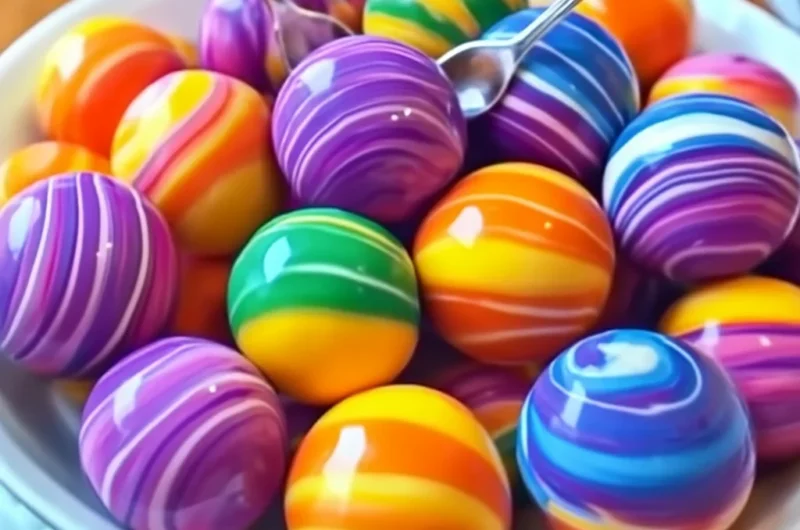
Do you remember that pure, unadulterated joy of finding a super bouncy ball in your stocking or as a party favor when you were a kid? The way it could zoom across the room, defy gravity with its leaps, and just make you giggle? There was something truly magical about those colorful spheres. Well, get ready to recapture that magic because today, my friend, we’re going to make our own!
This isn’t just a recipe; it’s an adventure! It’s a super easy, quick, and incredibly memorable craft that brings a burst of color and a whole lot of fun into your home. Seriously, you’ll be amazed at how simple it is to create these vibrant, springy beauties. It’s perfect for a rainy afternoon, a fun science experiment, or just because you want to add a little bounce to your day. And if you’re looking for another super simple, kid-friendly activity, you absolutely have to check out our recipe for Easy 3-Ingredient Slime.
Why You’ll Love Rainbow Bouncy Balls
- Fast: From start to bounce in under 15 minutes!
- Easy: Seriously, no complicated steps or fancy equipment needed.
- Giftable: These vibrant creations aren’t just for playing; they also make fantastic party favors or small gifts! Imagine pairing them with a batch of our delightful Easy No-Bake Caramel Pretzel Bars for a truly memorable present.
- Crowd-pleasing: Kids, teens, and even adults get a kick out of making and playing with these!
- Customizable: Endless possibilities for colors, sparkles, and even glow-in-the-dark fun!
Ingredients
You’ll be surprised how many of these you might already have hiding in your pantry or craft drawer!
- ½ cup Warm Water: Not boiling, not cold – just a nice warm temp to help everything dissolve.
- 1 tbsp Borax Powder: This is our secret scientific ingredient that makes all the magic happen!
- 2 tbsp White School Glue: Think classic Elmer’s! It’s the base that gives our balls their structure.
- 1 tbsp Cornstarch: Helps bind everything together and gives our bouncy balls a smoother texture.
- Food Coloring or Gel Dye: This is where the “rainbow” comes in! Gel dyes tend to give more vibrant colors, but liquid works great too.
- Glitter (Optional): For that extra sparkle and pizzazz!
- Glow-in-the-Dark Paint (Optional): Take the fun to a whole new level when the lights go out!
How to Make Rainbow Bouncy Balls
Let’s get those hands (and probably your kitchen counter) a little messy – in the best way possible!
- Prep Your Borax Solution: Grab one of your cups and pour in ½ cup of warm water. Add 1 tablespoon of borax powder. Stir it up until it’s completely dissolved. You want clear water, no grainy bits left. This is your “activator” for the glue!
- Mix Your Color Base: In a separate cup, combine 2 tablespoons of white school glue with 1 tablespoon of cornstarch. Now for the fun part: add a few drops of your chosen food coloring or gel dye. Start with a little, you can always add more! Stir it all together until you have a smooth, beautifully colored mixture.
- Introduce the Borax: Here’s where the science happens! Add about ½ tablespoon of your borax solution (from step 1) to your colored glue mixture. Stir quickly and consistently. You’ll notice almost immediately it starts to form a clumpy, gummy blob. Don’t worry, this is exactly what we want! It’s transforming before your eyes.
- Knead the Magic: Once you have that clumpy blob, carefully take it out of the cup and start kneading it with your hands. It might feel sticky at first, but keep going! Knead it for approximately 2 minutes. As you work it, it will become much smoother and less sticky, developing that wonderful bouncy texture. You’re basically molding its personality!
- Repeat for More Colors: If you’re aiming for that spectacular rainbow effect (and why wouldn’t you be?), repeat steps 2-4 for each desired color. I love seeing a vibrant palette laid out!
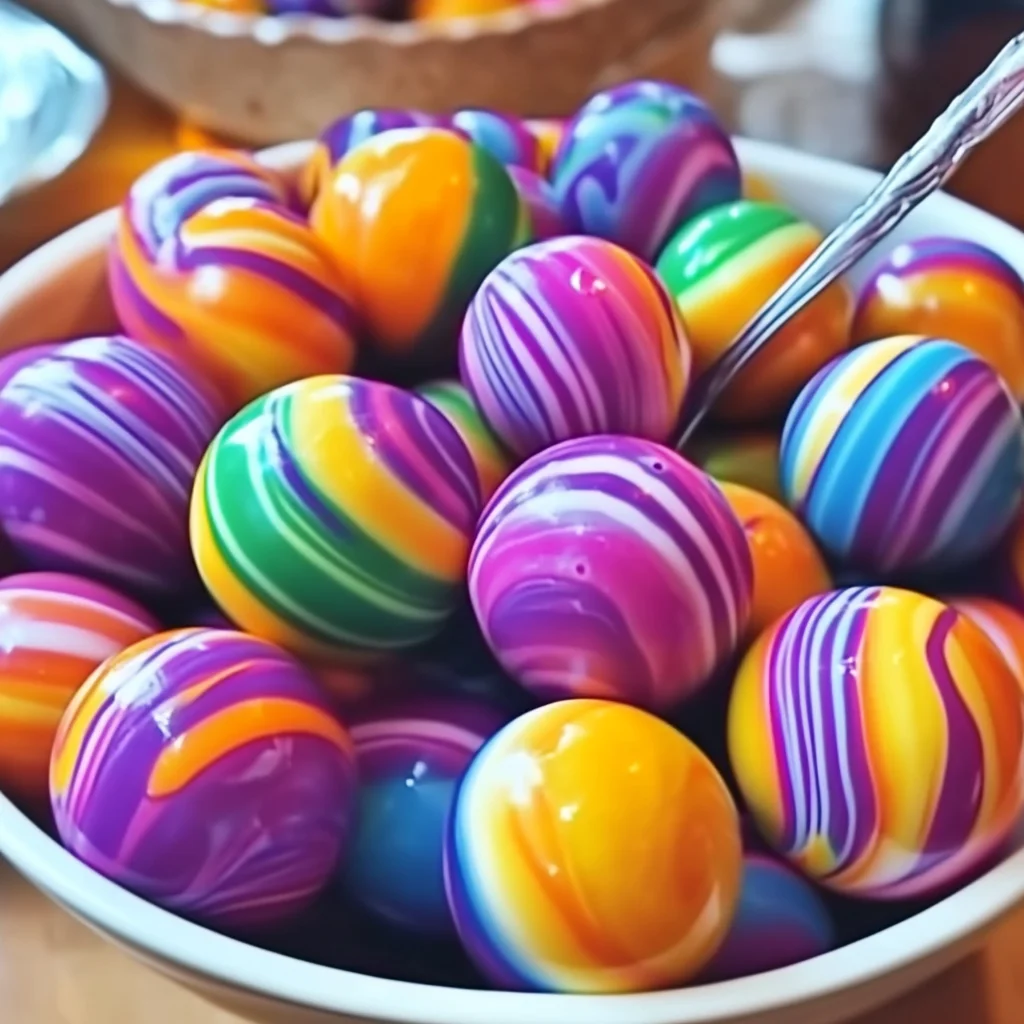
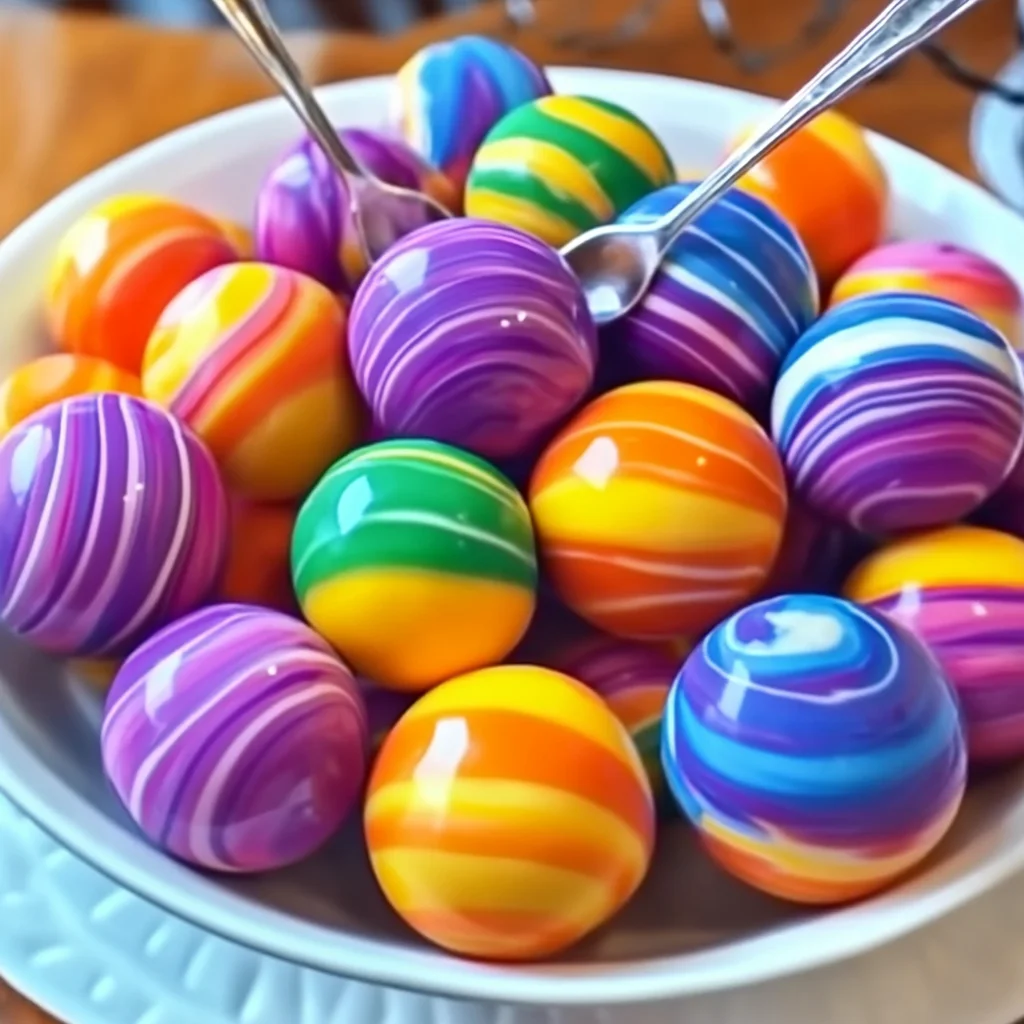
- Assemble Your Rainbow: Once you have all your individual colored bouncy ball pieces, it’s time to bring them together. Take small pieces of each color and press them together. Then, gently roll them in your hands, shaping them into a perfect sphere. The more you roll, the more the colors will swirl and blend, creating your unique rainbow design. And there you have it – your very own homemade bouncy ball, ready for action!
Substitutions & Additions
The beauty of a DIY project is making it truly yours!
- Color Intensity: For super bright, neon colors, definitely opt for gel food coloring. It packs a stronger punch than liquid drops.
- Sparkle Factor: Don’t just stop at glitter! You can mix in iridescent flakes, tiny sequins, or even glow-in-the-dark glitter for a magical touch.
- Sensory Play: A drop or two of essential oil (like peppermint or orange) could add a lovely scent, making these bouncy balls a treat for more than just sight! Just be sure to use kid-safe oils and ensure it’s well-mixed.
- Hidden Surprises: For an extra fun element, try embedding tiny, lightweight plastic charms or beads into the ball as you’re kneading the final stages.
Tips for Success
Even the simplest crafts have a few tricks up their sleeve to ensure a perfect outcome!
- Don’t Overdo the Borax: It’s tempting to add more borax solution if your mixture isn’t firming up quickly, but resist! Too much borax can make your ball brittle and less bouncy. Stick to the ½ tablespoon per batch.
- Kneading is Key: This isn’t just a suggestion; it’s crucial! The kneading process helps the ingredients fully combine and develops the elasticity needed for a good bounce. Don’t skip it!
- Separate Your Colors: If you’re making multiple colors, keep each batch separate until they’re fully formed and kneaded. This prevents them from blending into a muddy brown before you’ve had a chance to create your rainbow.
- Protect Your Workspace: While the ingredients are generally safe and non-staining, it’s always a good idea to lay down some newspaper or a plastic tablecloth, especially when working with food coloring.
- Supervise Little Ones: Borax powder should always be handled with adult supervision, and hands should be washed thoroughly after playing.
How to Store Rainbow Bouncy Balls
You’ll want to keep your colorful creations bouncy for as long as possible!
To keep your DIY bouncy balls in tip-top shape, store them in an airtight container or a sealed plastic bag when not in use. This prevents them from drying out and losing their elasticity. Keep them away from direct sunlight and extreme heat, which can degrade the materials. With proper storage, your bouncy balls should last a few weeks to a month, providing plenty of bouncing fun!
FAQs
Got questions? I’ve got answers!
Q: My bouncy ball isn’t very bouncy. What went wrong?
A: Most likely, it’s either too much borax solution or not enough kneading. Try reducing the borax solution slightly on your next batch, and make sure you really work the mixture with your hands for the full two minutes.
Q: Can I use glitter glue instead of white glue and separate glitter?
A: You sure can! Glitter glue works perfectly and can save you a step. Just be aware that the final color might be a little less opaque depending on the glitter glue you choose.
Q: Is this craft safe for very young children?
A: While fun, the recipe does use borax, which should always be handled with adult supervision. It’s best suited for older children who understand not to put the mixture in their mouths. Always ensure thorough hand washing after playing.
Q: How can I make my bouncy balls glow even brighter?
A: For extra glow, use a high-quality glow-in-the-dark paint (preferably liquid) and make sure your bouncy ball is “charged” by sitting under a bright light for a while before taking it into a dark room. Once you master these bouncy balls, you might be ready for more colorful adventures! Why not try making some Rainbow Gummy Tequila Pops (for the grown-ups, of course!) for your next get-together?
For more delicious recipes and fun craft ideas, follow us on Pinterest!
Bounce into Fun! DIY Rainbow Bouncy Balls: The Easiest Craft for Kids (and Kids at Heart!)
Do you remember that pure, unadulterated joy of finding a super bouncy ball in your stocking or as a party favor when you were a kid? The way it could zoom across the room, defy gravity with its leaps, and just make you giggle? There was something truly magical about those colorful spheres. Well, get ready to recapture that magic because today, my friend, we’re going to make our own!
This isn’t just a recipe; it’s an adventure! It’s a super easy, quick, and incredibly memorable craft that brings a burst of color and a whole lot of fun into your home. Seriously, you’ll be amazed at how simple it is to create these vibrant, springy beauties. It’s perfect for a rainy afternoon, a fun science experiment, or just because you want to add a little bounce to your day. And if you’re looking for another super simple, kid-friendly activity, you absolutely have to check out our recipe for Easy 3-Ingredient Slime.
Why You’ll Love Rainbow Bouncy Balls
- Fast
- Easy
- Giftable
- Crowd-pleasing
Ingredients
You’ll be surprised how many of these you might already have hiding in your pantry or craft drawer!
- ½ cup Warm Water: Not boiling, not cold – just a nice warm temp to help everything dissolve.
- 1 tbsp Borax Powder: This is our secret scientific ingredient that makes all the magic happen!
- 2 tbsp White School Glue: Think classic Elmer’s! It’s the base that gives our balls their structure.
- 1 tbsp Cornstarch: Helps bind everything together and gives our bouncy balls a smoother texture.
- Food Coloring or Gel Dye: This is where the “rainbow” comes in! Gel dyes tend to give more vibrant colors, but liquid works great too.
- Glitter (Optional): For that extra sparkle and pizzazz!
- Glow-in-the-Dark Paint (Optional): Take the fun to a whole new level when the lights go out!
How to Make Rainbow Bouncy Balls
Let’s get those hands (and probably your kitchen counter) a little messy – in the best way possible!
- Prep Your Borax Solution: Grab one of your cups and pour in ½ cup of warm water. Add 1 tablespoon of borax powder. Stir it up until it’s completely dissolved. You want clear water, no grainy bits left. This is your “activator” for the glue!
- Mix Your Color Base: In a separate cup, combine 2 tablespoons of white school glue with 1 tablespoon of cornstarch. Now for the fun part: add a few drops of your chosen food coloring or gel dye. Start with a little, you can always add more! Stir it all together until you have a smooth, beautifully colored mixture.
- Introduce the Borax: Here’s where the science happens! Add about ½ tablespoon of your borax solution (from step 1) to your colored glue mixture. Stir quickly and consistently. You’ll notice almost immediately it starts to form a clumpy, gummy blob. Don’t worry, this is exactly what we want! It’s transforming before your eyes.
- Knead the Magic: Once you have that clumpy blob, carefully take it out of the cup and start kneading it with your hands. It might feel sticky at first, but keep going! Knead it for approximately 2 minutes. As you work it, it will become much smoother and less sticky, developing that wonderful bouncy texture. You’re basically molding its personality!
- Repeat for More Colors: If you’re aiming for that spectacular rainbow effect (and why wouldn’t you be?), repeat steps 2-4 for each desired color. I love seeing a vibrant palette laid out!
- Assemble Your Rainbow: Once you have all your individual colored bouncy ball pieces, it’s time to bring them together. Take small pieces of each color and press them together. Then, gently roll them in your hands, shaping them into a perfect sphere. The more you roll, the more the colors will swirl and blend, creating your unique rainbow design. And there you have it – your very own homemade bouncy ball, ready for action!
Substitutions & Additions
The beauty of a DIY project is making it truly yours!
- Color Intensity: For super bright, neon colors, definitely opt for gel food coloring. It packs a stronger punch than liquid drops.
- Sparkle Factor: Don’t just stop at glitter! You can mix in iridescent flakes, tiny sequins, or even glow-in-the-dark glitter for a magical touch.
- Sensory Play: A drop or two of essential oil (like peppermint or orange) could add a lovely scent, making these bouncy balls a treat for more than just sight! Just be sure to use kid-safe oils and ensure it’s well-mixed.
- Hidden Surprises: For an extra fun element, try embedding tiny, lightweight plastic charms or beads into the ball as you’re kneading the final stages.
Tips for Success
Even the simplest crafts have a few tricks up their sleeve to ensure a perfect outcome!
- Don’t Overdo the Borax: It’s tempting to add more borax solution if your mixture isn’t firming up quickly, but resist! Too much borax can make your ball brittle and less bouncy. Stick to the ½ tablespoon per batch.
- Kneading is Key: This isn’t just a suggestion; it’s crucial! The kneading process helps the ingredients fully combine and develops the elasticity needed for a good bounce. Don’t skip it!
- Separate Your Colors: If you’re making multiple colors, keep each batch separate until they’re fully formed and kneaded. This prevents them from blending into a muddy brown before you’ve had a chance to create your rainbow.
- Protect Your Workspace: While the ingredients are generally safe and non-staining, it’s always a good idea to lay down some newspaper or a plastic tablecloth, especially when working with food coloring.
- Supervise Little Ones: Borax powder should always be handled with adult supervision, and hands should be washed thoroughly after playing.
How to Store Rainbow Bouncy Balls
You’ll want to keep your colorful creations bouncy for as long as possible!
To keep your DIY bouncy balls in tip-top shape, store them in an airtight container or a sealed plastic bag when not in use. This prevents them from drying out and losing their elasticity. Keep them away from direct sunlight and extreme heat, which can degrade the materials. With proper storage, your bouncy balls should last a few weeks to a month, providing plenty of bouncing fun!
FAQs
Got questions? I’ve got answers!
Q: My bouncy ball isn’t very bouncy. What went wrong?
A: Most likely, it’s either too much borax solution or not enough kneading. Try reducing the borax solution slightly on your next batch, and make sure you really work the mixture with your hands for the full two minutes.
Q: Can I use glitter glue instead of white glue and separate glitter?
A: You sure can! Glitter glue works perfectly and can save you a step. Just be aware that the final color might be a little less opaque depending on the glitter glue you choose.
Q: Is this craft safe for very young children?
A: While fun, the recipe does use borax, which should always be handled with adult supervision. It’s best suited for older children who understand not to put the mixture in their mouths. Always ensure thorough hand washing after playing.
Q: How can I make my bouncy balls glow even brighter?
A: For extra glow, use a high-quality glow-in-the-dark paint (preferably liquid) and make sure your bouncy ball is “charged” by sitting under a bright light for a while before taking it into a dark room. Once you master these bouncy balls, you might be ready for more colorful adventures! Why not try making some Rainbow Gummy Tequila Pops (for the grown-ups, of course!) for your next get-together?
For more delicious recipes and fun craft ideas, follow us on Pinterest!
DIY Rainbow Bouncy Balls: The Easiest Craft for Kids (and Kids at Heart!)
Ingredients
Equipment
Method
- Step 1: Prep Your Borax Solution: Grab one of your cups and pour in ½ cup of warm water. Add 1 tablespoon of borax powder. Stir it up until it's completely dissolved. You want clear water, no grainy bits left. This is your "activator" for the glue!
- Step 2: Mix Your Color Base: In a separate cup, combine 2 tablespoons of white school glue with 1 tablespoon of cornstarch. Now for the fun part: add a few drops of your chosen food coloring or gel dye. Start with a little, you can always add more! Stir it all together until you have a smooth, beautifully colored mixture.
- Step 3: Introduce the Borax: Here’s where the science happens! Add about ½ tablespoon of your borax solution (from step 1) to your colored glue mixture. Stir quickly and consistently. You’ll notice almost immediately it starts to form a clumpy, gummy blob. Don’t worry, this is exactly what we want! It’s transforming before your eyes.
- Step 4: Knead the Magic: Once you have that clumpy blob, carefully take it out of the cup and start kneading it with your hands. It might feel sticky at first, but keep going! Knead it for approximately 2 minutes. As you work it, it will become much smoother and less sticky, developing that wonderful bouncy texture. You're basically molding its personality!
- Step 5: Repeat for More Colors: If you're aiming for that spectacular rainbow effect (and why wouldn't you be?), repeat steps 2-4 for each desired color. I love seeing a vibrant palette laid out!
- Step 6: Assemble Your Rainbow: Once you have all your individual colored bouncy ball pieces, it’s time to bring them together. Take small pieces of each color and press them together. Then, gently roll them in your hands, shaping them into a perfect sphere. The more you roll, the more the colors will swirl and blend, creating your unique rainbow design. And there you have it – your very own homemade bouncy ball, ready for action!