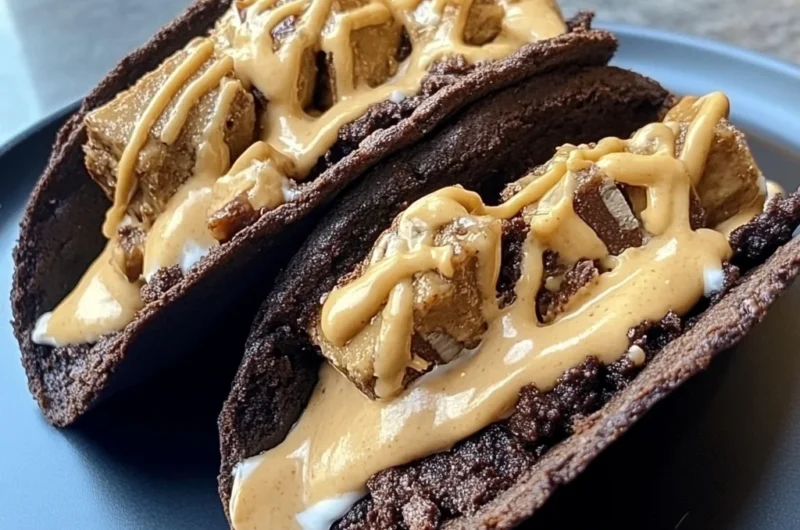
There’s something so magical about biting into a dessert that feels both nostalgic and delightfully new at the same time. I remember the first time I made these fudgy brownie peanut butter tacos—it was like rediscovering the joy of my favorite childhood flavors, wrapped up in a fun, handheld treat. The rich, fudgy brownie shells perfectly cradle a luscious peanut butter mousse, topped with crunchy cookie crumbles and drizzled with warm chocolate syrup. It’s a dessert that’s as playful as it is indulgent, and honestly, it’s become a go-to whenever I want to impress friends or just treat myself after a long day.
What I love most about this recipe is how simple and quick it is to put together, despite looking so fancy and impressive. If you’ve ever been intimidated by homemade desserts that require complicated steps or hours in the kitchen, take a deep breath and give these brownies a try. You’ll be amazed at how effortless it is to create something so memorable. Plus, they make fantastic gifts or party treats that’ll have everyone asking for the recipe!
Why You’ll Love Fudgy Brownie Peanut Butter Tacos
- Fast: You can whip these up in under an hour, perfect for last-minute dessert cravings.
- Easy: No fancy techniques needed—just simple mixing, baking, and a little creative shaping.
- Giftable: These tacos are charming and unique, making them an ideal gift for friends and family.
- Crowd-pleasing: Who doesn’t love the combo of chocolate and peanut butter? These will disappear fast!
Ingredients
Before you dive in, let’s talk about the ingredients you’ll need. I always find it helps to have everything laid out before starting—it makes the process smoother and more enjoyable.
- Granulated sugar: This sweetens the brownie shells perfectly without overpowering the cocoa flavor.
- Unsalted butter: Melted and cooled, it adds richness and helps create that fudgy texture.
- Large eggs: At room temperature for better mixing and a tender crumb.
- Vanilla extract: A splash of vanilla brings warmth and depth to both the brownie and mousse.
- All-purpose flour: The base for your brownie shell, just enough to hold the shape without making it cakey.
- Unsweetened cocoa powder: Sifted for smoothness, this gives the shell its deep chocolate flavor.
- Salt and baking powder: Balances flavors and gives a slight lift to your brownie shells.
- Creamy peanut butter: Make sure it’s the classic creamy kind—not natural or chunky—for a silky mousse.
- Cream cheese: Softened to room temperature for a smooth, tangy contrast to the peanut butter.
- Powdered sugar: Sweetens the mousse without any graininess.
- Heavy whipping cream: Cold and whipped to stiff peaks, it lightens the mousse into a fluffy cloud.
- Toppings: Crushed chocolate sandwich cookies or peanut butter cookies add crunch and texture, while chocolate syrup or warm hot fudge sauce brings that extra indulgence.
How to Make Fudgy Brownie Peanut Butter Tacos
Ready to roll up your sleeves? I’ll walk you through each step carefully so you can feel confident making these at home. It’s easier than you think!
Step 1: Prepare Your Oven and Baking Sheets
Start by preheating your oven to 350°F (175°C). Line two large baking sheets with parchment paper. This ensures your brownie shells won’t stick and will bake evenly.
Step 2: Mix the Brownie Batter
In a medium bowl, whisk together the melted butter and granulated sugar until fully combined. This step is key to getting that fudgy texture. Next, add the eggs and vanilla extract, whisking until the mixture is smooth and glossy—this little moment is so satisfying to see as the ingredients come together.
Now, sift together the flour, cocoa powder, salt, and baking powder. Sifting is important here to avoid lumps and ensure a smooth batter. Gently fold the dry ingredients into the wet mixture using a spatula. Be careful not to overmix; you want the batter thick but smooth.
Step 3: Shape and Bake the Brownie Shells
Drop heaping tablespoons of batter onto your prepared baking sheets, spacing each about 4 inches apart. Using the back of a spoon, spread each mound into a thin circle approximately 5 to 6 inches wide. This thin layer is what will allow the brownies to be flexible enough to shape later.
Bake one sheet at a time for 6 to 8 minutes. You’re aiming for edges that are set but centers that still look slightly underdone—this ensures the shells remain soft and pliable when you shape them.
Step 4: Shape the Brownie Tacos
Right after baking, remove the sheet from the oven and let the cookies cool for about 30 seconds. While they’re still warm, carefully lift each brownie round with a thin metal spatula and drape it over the handle of a wooden spoon, rolling pin, or even the edge of a loaf pan. Press gently to set the curve. This is where the magic happens! Repeat with all rounds, then allow them to cool completely in their taco shape. If you leave them flat, they’ll harden and lose the fun taco form.
Step 5: Make the Peanut Butter Mousse Filling
In a large bowl, beat the softened cream cheese and peanut butter together with an electric mixer until smooth and creamy. Add the powdered sugar and vanilla extract, mixing until well combined. In a separate bowl, whip the cold heavy cream to stiff peaks. This step is crucial—it gives your mousse that light, airy texture.
Gently fold the whipped cream into the peanut butter mixture in two additions. Folding preserves the airiness and prevents the mousse from deflating. Once your mousse is light and fluffy, pop it into the fridge for at least 30 minutes to chill and firm up slightly.
Step 6: Assemble Your Brownie Peanut Butter Tacos
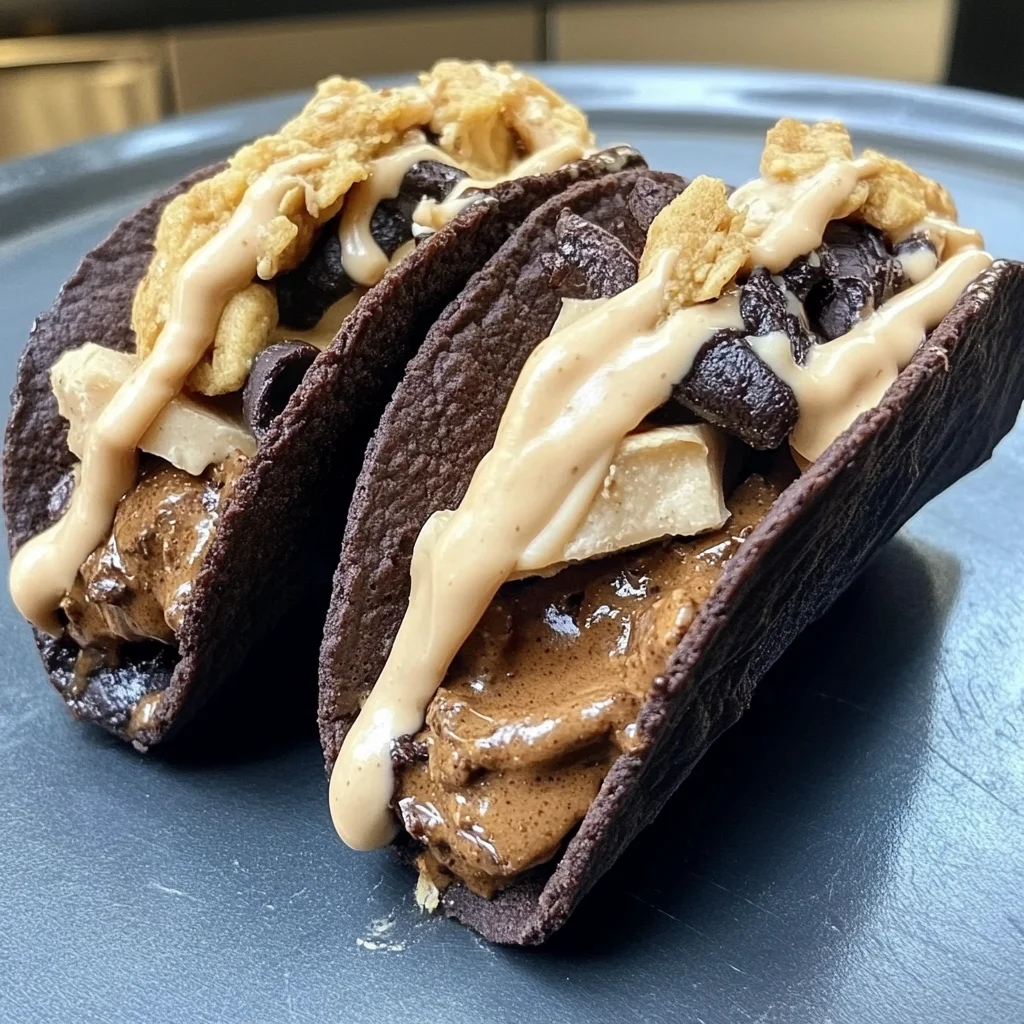
Transfer the chilled mousse into a piping bag fitted with a star tip, or simply use a zip-top bag with a corner snipped off. Pipe the mousse generously into each cooled brownie shell, filling it like a taco. Don’t be shy—these are meant to be indulgent!
Top each taco with crushed chocolate sandwich cookies or peanut butter cookies for a delightful crunch. Drizzle with chocolate syrup or warm hot fudge sauce for that extra layer of decadence.
Step 7: Chill and Serve
Place your assembled tacos in the refrigerator for 15 to 20 minutes before serving. This helps everything set up nicely and makes for a perfectly chilled, creamy bite. Serve them straight from the fridge and watch them disappear in minutes!
Substitutions & Additions
One of the best things about this recipe is how adaptable it is. Here are some fun ways to switch things up or make it your own:
- Nut Butters: If you’re not a peanut butter fan, try almond butter or cashew butter for a different but equally creamy filling.
- Cookie Toppings: Swap out the crushed cookies for chopped nuts, mini chocolate chips, or even toffee bits for added texture.
- Chocolate Shells: For a more intense chocolate flavor, add a handful of mini chocolate chips to the batter before baking.
- Vegan Version: Use dairy-free butter, a flax egg substitute, and coconut cream whipped to stiff peaks for a vegan-friendly mousse.
- Extra Flavors: Add a pinch of cinnamon or espresso powder to the brownie batter to deepen the flavor.
- Fruit Toppings: Fresh raspberries or sliced bananas make a lovely contrast to the rich peanut butter and chocolate.
If you’re interested in other no-bake peanut butter desserts, you might enjoy the No-Bake Amish Peanut Butter Pie—it’s a creamy delight perfect for peanut butter lovers.
Tips for Success
Making fudgy brownie peanut butter tacos is straightforward, but here are some tips to ensure your dessert turns out perfectly every time:
- Don’t overbake the brownie shells: Remember, you want them just set on the edges and slightly underdone in the center so they stay flexible.
- Shape while warm: The shells become brittle as they cool, so shape them immediately after baking for that perfect taco form.
- Use room temperature eggs: This helps your batter come together more smoothly and evenly.
- Whip cream to stiff peaks: Soft peaks won’t hold the mousse’s shape as well, so take your time whipping the cream properly.
- Chill the mousse: Letting the mousse chill before filling helps it firm up and hold its shape better inside the shells.
- Prep ahead: You can bake and shape the brownie shells a day in advance—store them in an airtight container at room temperature. The mousse can be made and refrigerated up to 2 days ahead as well.
If you want to keep things really simple, you might also enjoy the No-Bake Brownie Batter Dip—it’s a quick, decadent dessert that pairs well with fresh fruit or cookies.
How to Store Fudgy Brownie Peanut Butter Tacos
Once assembled, these fudge brownie peanut butter tacos are best stored in the refrigerator to keep the mousse fresh and the shells from becoming too soft. Place them in an airtight container, layering them carefully so they don’t squish. They’ll stay fresh for up to 3 days, but honestly, they rarely last that long in my house!
If you’d like to prepare the shells and mousse separately ahead of time, keep the brownie shells in an airtight container at room temperature for up to 2 days, and store the mousse in the fridge. Assemble the tacos just before serving for the best texture and flavor.
Refrigerate leftovers and enjoy them chilled—if the brownie shells soften a bit, you can refresh them by warming gently in a toaster oven for a few minutes before serving.
FAQs
Can I make the brownie shells gluten-free?
Yes! Substitute the all-purpose flour with a gluten-free baking blend. Just make sure it’s a blend that includes xanthan gum or a similar binder to help the shells hold their shape.
What if I don’t have a piping bag?
No worries! You can use a zip-top plastic bag with a small corner snipped off to pipe the mousse. Alternatively, you can spread it with a spoon, though piping makes it look extra pretty.
Can I freeze these tacos?
Because of the whipped cream in the mousse, freezing isn’t ideal as it can change the texture. It’s best to store them in the fridge and eat within a few days.
Can I use natural peanut butter?
For the creamiest mousse, it’s better to use classic creamy peanut butter rather than natural, which is often oil-separated and less smooth.
If you’re in the mood for more cozy, comforting recipes to warm you up, check out this Cozy Creamy Tortellini Soup. It’s a perfect way to balance out your sweet treats with something savory and satisfying.
And when you’re ready for another chocolate-packed delight, don’t miss the Simple Chocolate Dump Cake, a super easy recipe that’s always a hit.
Happy baking and indulging! Remember, the kitchen is your playground—have fun with these fudgy brownie peanut butter tacos and make them your own.
For more delicious inspiration and creative recipes, be sure to follow us on Pinterest.
Fudgy Brownie Peanut Butter Tacos
Ingredients
Equipment
Method
- Step 1: Preheat oven to 350°F (175°C). Line two large baking sheets with parchment paper to prevent sticking and ensure even baking.
- Step 2: In a medium bowl, whisk melted and cooled butter with granulated sugar until fully combined. Add eggs and vanilla extract, whisking until smooth and glossy.
- Step 3: Sift together flour, cocoa powder, salt, and baking powder. Gently fold dry ingredients into wet mixture using a spatula. Avoid overmixing; batter should be thick but smooth.
- Step 4: Drop heaping tablespoons of batter onto prepared baking sheets, spacing about 4 inches apart. Use the back of a spoon to spread each mound into a thin 5 to 6 inch circle.
- Step 5: Bake one sheet at a time for 6 to 8 minutes until edges are set but centers still look slightly underdone to keep shells flexible.
- Step 6: Remove from oven and let cool for 30 seconds. While warm, lift each brownie round with a thin metal spatula and drape over a wooden spoon handle, rolling pin, or loaf pan edge to form taco shape. Allow to cool completely in shape.
- Step 7: In a large bowl, beat softened cream cheese and peanut butter until smooth and creamy. Add powdered sugar and vanilla extract; mix until combined.
- Step 8: In a separate bowl, whip cold heavy cream to stiff peaks. Gently fold whipped cream into peanut butter mixture in two additions to keep mousse airy.
- Step 9: Chill mousse in fridge at least 30 minutes to firm up slightly before filling shells.
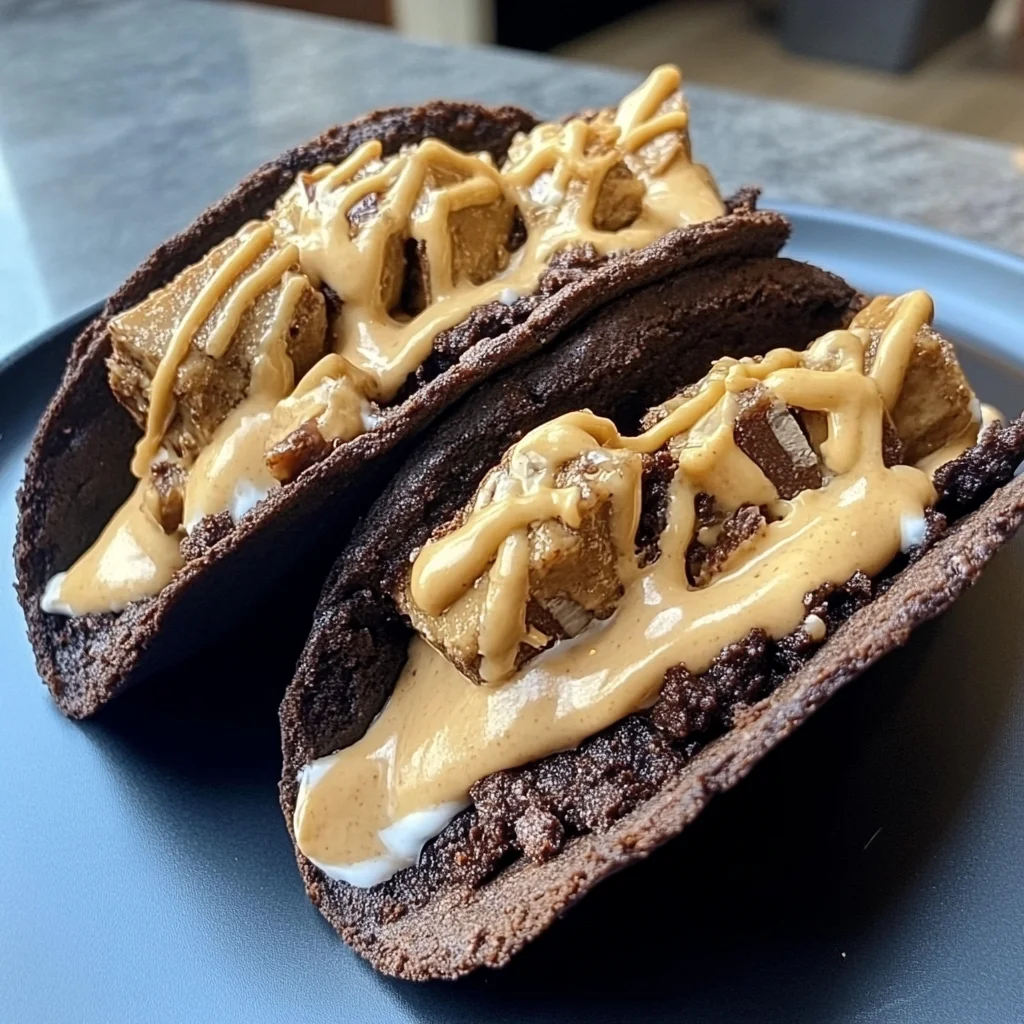
- Step 10: Transfer mousse to a piping bag or zip-top bag with a corner snipped. Pipe mousse generously into each cooled brownie shell, filling like a taco.
- Step 11: Top each taco with crushed cookies and drizzle with chocolate syrup or warm hot fudge sauce for extra decadence.
- Step 12: Refrigerate assembled tacos for 15 to 20 minutes before serving to help set mousse and enhance texture. Serve chilled.