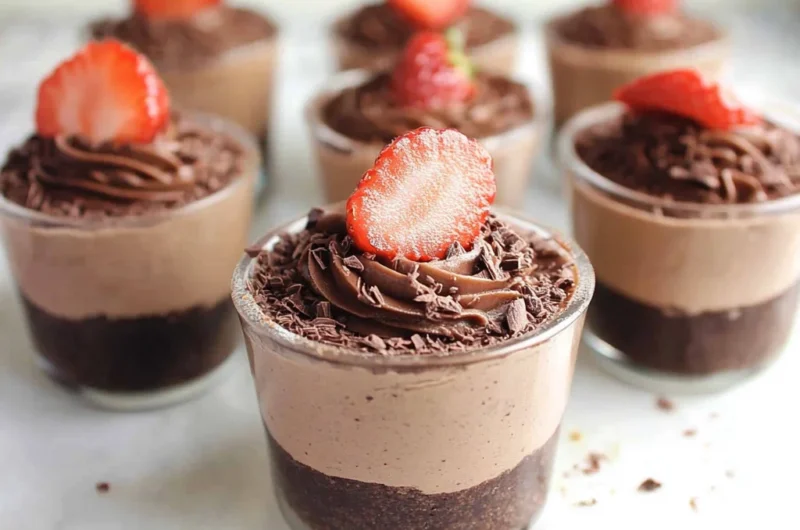
There’s something magical about a dessert that feels like a hug in a cup—creamy, chocolatey, and just the right amount of sweet. I remember the first time I whipped up these Creamy Chocolate No-Bake Cheesecake Cups for a casual get-together. Everyone was amazed that something so decadent could be so simple to make. No oven fuss, no complicated steps—just pure, rich bliss in each spoonful. If you’re looking for a quick, memorable dessert that’s perfect for any occasion, you’re going to love this recipe.
Whether you’re craving a cozy treat after a long day or want to impress friends without breaking a sweat, these cheesecake cups are your new go-to. Trust me, once you make them, you’ll wonder how you ever lived without this easy chocolatey delight.
Why You’ll Love Creamy Chocolate No-Bake Cheesecake Cups
- Fast: Ready in under 20 minutes, plus chilling time.
- Easy: No baking, no complex skills—just mixing and chilling.
- Giftable: Presented in pretty glasses, they make delightful edible gifts.
- Crowd-pleasing: Chocolate and cheesecake? That’s a winning combo everyone loves.
Ingredients
Before you dive in, let’s talk about the ingredients that make these cheesecake cups so irresistible:
- Chocolate graham cracker crumbs or crushed OREO cookies: These form the crunchy base layer. I love using OREOs for a richer chocolate flavor, but graham crackers add a nice sweetness and crunch.
- Salted butter: Melted to bind the crumbs together and add richness.
- Heavy cream or whipping cream: This is what we whip into fluffy peaks for that light, airy texture.
- Unsweetened cocoa powder: Adds deep chocolate flavor without extra sweetness.
- Powdered sugar: Divided for sweetness—some in the cream cheese, some in the whipped cream.
- Cream cheese: The star of the cheesecake—softened to room temperature for smooth blending.
- Vanilla extract: A splash to round out the flavors and add warmth.
These simple ingredients come together to create a dessert that feels luxurious but is surprisingly easy to make. If you’re curious about other no-bake treats, you might also enjoy the No-Bake Amish Peanut Butter Pie, which is another favorite of mine when I want quick, fuss-free desserts.
How to Make Creamy Chocolate No-Bake Cheesecake Cups
Now, let’s walk through the process step-by-step. I’ll share some tips along the way to help you get that perfect creamy texture.
Step 1: Prepare the Crust
Start by combining your melted butter with the chocolate graham cracker crumbs or crushed OREOs in a small bowl. You want the crumbs to be evenly coated with butter, which helps them stick together and form a nice base. For an extra touch, I sometimes add a pinch of cinnamon to the crumbs—it gives a subtle warmth that pairs beautifully with chocolate.
Next, divide 2-3 tablespoons of this crumb mixture into the bottom of each glass or serving dish. Press it down gently with the back of a spoon to create a firm base. This little step makes a big difference in texture when you take a bite.
Step 2: Whip the Chocolate Cream
In a mixing bowl, add the heavy cream, cocoa powder, and 3/4 cup of the powdered sugar. Using an electric mixer, beat this mixture until stiff peaks form. This means when you lift your beaters, the cream holds its shape firmly without drooping. It’s the secret to that light, fluffy feel that makes these cups so dreamy.
Pro tip: Make sure your heavy cream is cold straight from the fridge. Cold cream whips up faster and holds better. You can even chill your mixing bowl and beaters for best results!
Step 3: Prepare the Cream Cheese Mixture
In a separate bowl, beat the softened cream cheese with the remaining powdered sugar until smooth and soft. This step is crucial; no lumps allowed! Once that’s silky, add the vanilla extract and mix until combined. The vanilla adds a lovely depth that complements the chocolate without overpowering it.
Step 4: Fold It All Together
Now, the fun part—gently fold the cream cheese mixture into the whipped chocolate cream. Use a spatula and fold carefully to keep the airiness intact. You want a perfectly blended, smooth mixture with a luscious texture. Resist the urge to overmix here; a gentle touch makes all the difference.
Step 5: Fill Your Cups
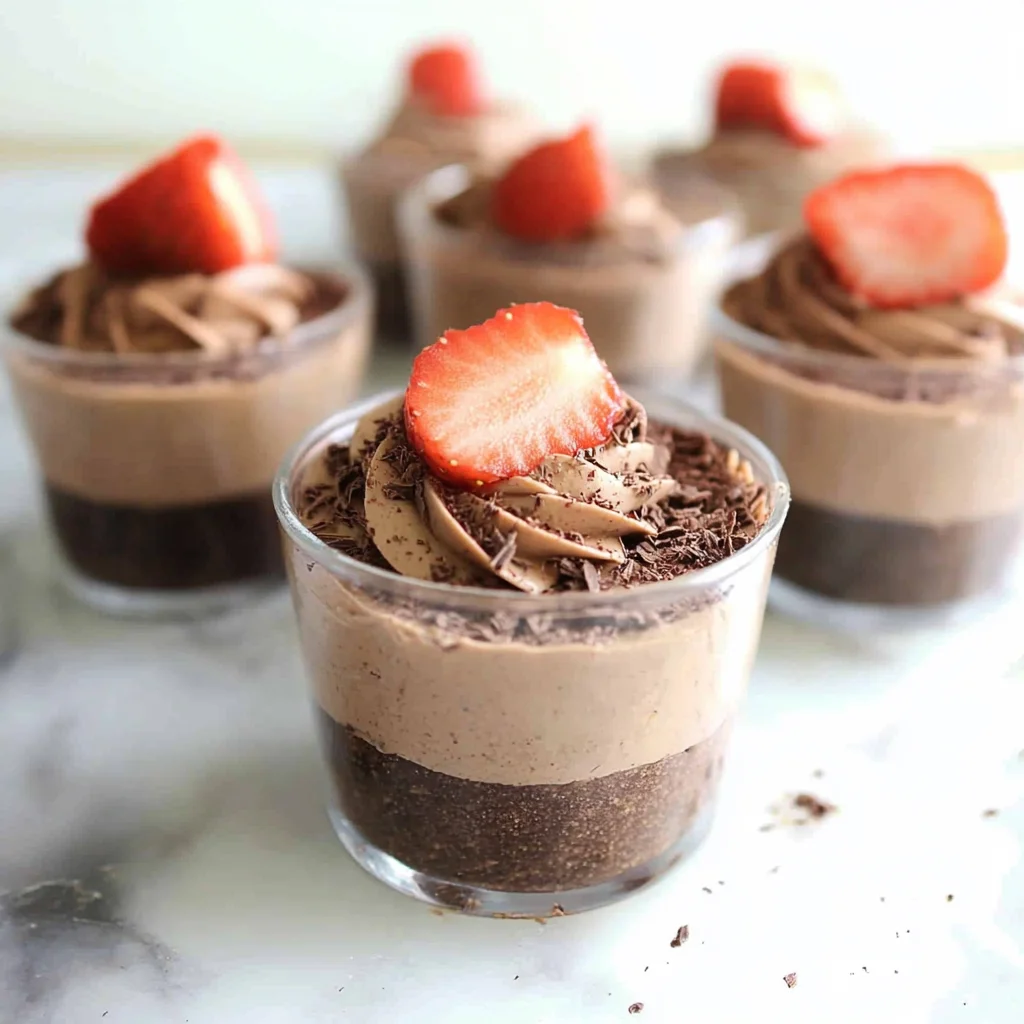
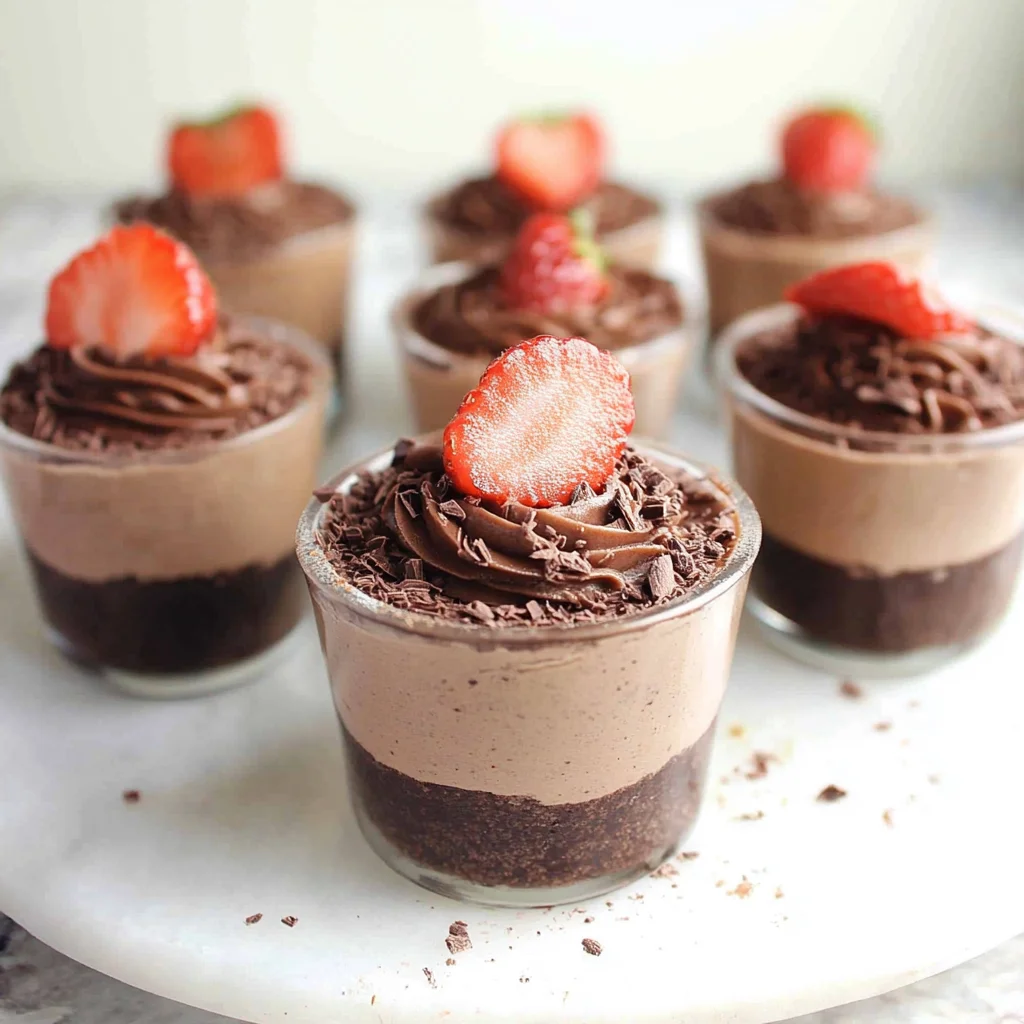
Spoon or pipe the creamy mixture evenly into your prepared glasses over the crust. I love using a piping bag or even a zip-top bag with the corner snipped off for a pretty presentation. It turns a simple dessert into something special that looks like you spent hours on it.
Step 6: Add Toppings and Chill
To finish, top your cheesecake cups with fresh fruit like raspberries or strawberries, or sprinkle additional cookie crumbs on top for extra crunch. Cover and chill them in the fridge for at least 1 hour before serving. This chilling time lets the flavors meld and the texture set perfectly.
If you’re a fan of chocolate desserts, be sure to check out the Simple Chocolate Dump Cake for another easy and crowd-pleasing treat.
Substitutions & Additions
One of the best things about this recipe is how flexible it is. Don’t have graham crackers? No problem! Crushed OREO cookies work wonderfully for a double chocolate experience. Or try crushed Biscoff cookies for a spicy twist that’s just as delightful.
If you want a lighter version, swap out heavy cream for half-and-half, but keep in mind the texture won’t be quite as thick and fluffy. For a dairy-free option, coconut cream can be whipped up similarly, and dairy-free cream cheese alternatives are available to keep it creamy and rich.
Feeling adventurous? Add a splash of coffee or espresso powder to the cream mixture for a mocha flavor that’s perfect for coffee lovers. Or swirl in some peanut butter for a chocolate-peanut butter dream. For festive occasions, sprinkle colorful candy pieces on top or drizzle with caramel or chocolate sauce.
Tips for Success
- Room temperature cream cheese: This is key to avoid lumps and get a smooth mixture. If you forget to soften it, just microwave in 5-second bursts until soft but not melted.
- Chill your equipment: For the best whipped cream, chill your bowl and beaters before whipping.
- Don’t overmix: When folding the cream cheese into the whipped cream, be gentle to keep the fluffiness.
- Prep ahead: You can make these cups up to 24 hours in advance. Just keep them covered and chilled until ready to serve.
- Presentation matters: Use clear glasses or pretty jars to show off the layers. It makes serving feel extra special.
How to Store Creamy Chocolate No-Bake Cheesecake Cups
Once assembled and chilled, your cheesecake cups can be stored in the refrigerator for up to 3 days. Keep them covered with plastic wrap or in an airtight container to prevent them from absorbing any fridge odors and to keep the texture fresh. If you want to prepare in advance for a party, these hold up beautifully and actually taste even better after the flavors have had time to meld.
While I haven’t tried freezing these, I imagine the texture might change due to the whipped cream. I recommend sticking to refrigeration for the best experience. When ready to serve, just let them sit at room temperature for about 10 minutes to take the chill off—it helps the flavors shine.
FAQs
Can I use regular sugar instead of powdered sugar?
Powdered sugar dissolves more easily and helps keep the texture smooth and creamy. Regular granulated sugar might leave a gritty texture, so I recommend sticking with powdered sugar for this recipe.
What if I don’t have an electric mixer?
While an electric mixer makes whipping the cream easier and faster, you can use a hand whisk if you’re up for a little arm workout! Just make sure to whisk vigorously until stiff peaks form, which might take a bit more time.
Can I make these vegan?
Absolutely! Use coconut cream instead of heavy cream and vegan cream cheese alternatives. Just keep in mind the texture and flavor will be slightly different but still delicious.
How can I make this dessert more festive?
Try adding a layer of raspberry or cherry jam between the crust and filling for a surprise fruity twist. You can also sprinkle edible glitter or crushed peppermint candies on top during the holidays for a fun touch.
For other no-bake dessert ideas that are just as easy and delicious, you might want to explore the Easy No-Bake Martha Washington Candy recipe. It’s a classic treat that’s perfect for gifting or sharing at parties.
Making these Creamy Chocolate No-Bake Cheesecake Cups has become one of my favorite ways to treat myself and guests without spending hours in the kitchen. They’re elegant, indulgent, and so simple that you can whip them up anytime the chocolate craving strikes. I hope you enjoy making and sharing this recipe as much as I do!
Don’t forget to follow my Pinterest page for more delicious recipes and inspiration to brighten up your kitchen adventures.
Creamy Chocolate No-Bake Cheesecake Cups
Ingredients
Equipment
Method
- Step 1: Combine melted butter with chocolate graham cracker crumbs or crushed OREOs in a small bowl. Mix well and divide 2-3 tablespoons of crumb mixture into each serving glass. Press down gently to form a firm base.
- Step 2: In a mixing bowl, add heavy cream, cocoa powder, and 3/4 cup powdered sugar. Beat with an electric mixer until stiff peaks form.
- Step 3: In a separate bowl, beat softened cream cheese with remaining powdered sugar until smooth. Add vanilla extract and mix until combined.
- Step 4: Gently fold the cream cheese mixture into the whipped chocolate cream using a spatula, keeping the mixture light and airy.
- Step 5: Spoon or pipe the creamy mixture evenly over the crust in each glass.
- Step 6: Top with fresh fruit or extra cookie crumbs if desired. Cover and chill in the refrigerator for at least 1 hour before serving.