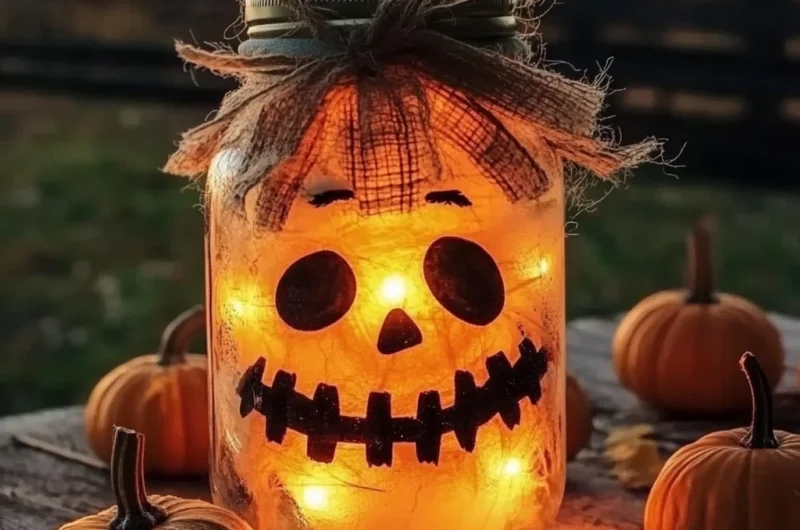
Hey there, my crafty friends! Can you feel that crisp, cool air starting to whisper through the leaves? That sweet, earthy scent of autumn? For me, fall isn’t just a season; it’s a whole vibe! It’s all about cozy nights, warm drinks, pumpkin spice everything, and bringing that beautiful, rustic charm into our homes. And what better way to do that than with a super simple, absolutely adorable craft that brightens up any corner?
Today, I’m so excited to share how you can create these enchanting Light-Up Scarecrow Mason Jars. Trust me, if you can tear paper and glue a few things, you can make these. They’re quick, they’re easy, and they instantly add that heartwarming, nostalgic touch of autumn to your decor. Get ready to fall in love with your new favorite DIY project!
Why You’ll Love Light-Up Scarecrow Mason Jars
- Fast: You’ll have these adorable jars glowing in no time!
- Easy: Perfect for all skill levels – no complicated steps here!
- Giftable: They make charming handmade gifts for friends, teachers, or family.
- Crowd-pleasing: Everyone will ooh and aah over these festive fall decorations.
Materials
Gathering your supplies is part of the fun! Here’s what you’ll need to bring your little scarecrow friends to life:
- 1 clean mason jar (any size): Quart-sized jars work wonderfully, but feel free to play with pint or even half-gallon jars for varying effects!
- Orange or amber tissue paper (or paint): This will give your scarecrow that classic pumpkin-orange glow. Tearing it into pieces gives a rustic, layered look.
- Mod Podge or clear-drying glue: My go-to for decoupage crafts! It acts as both glue and a sealer.
- Black construction paper or vinyl (for scarecrow face): Construction paper is easy to cut, but vinyl gives a really crisp, clean look if you have some on hand.
- Burlap scraps or raffia (for “hair” and scarf): These natural textures truly bring out the scarecrow charm.
- Twine or ribbon: For tying a cute little scarf around your scarecrow’s neck.
- Battery-operated tea light or fairy lights: Safety first! These provide a gentle, warm glow without any fire risk.
- Hot glue gun: Your best friend for quick and secure attachments.
- Optional: Cinnamon sticks, dried star anise, or buttons for decoration: These little extras really elevate your jar and add a delightful autumnal scent if you use spices!
How to Make Light-Up Scarecrow Mason Jars
Let’s get crafting! You’ll be amazed at how quickly these come together.
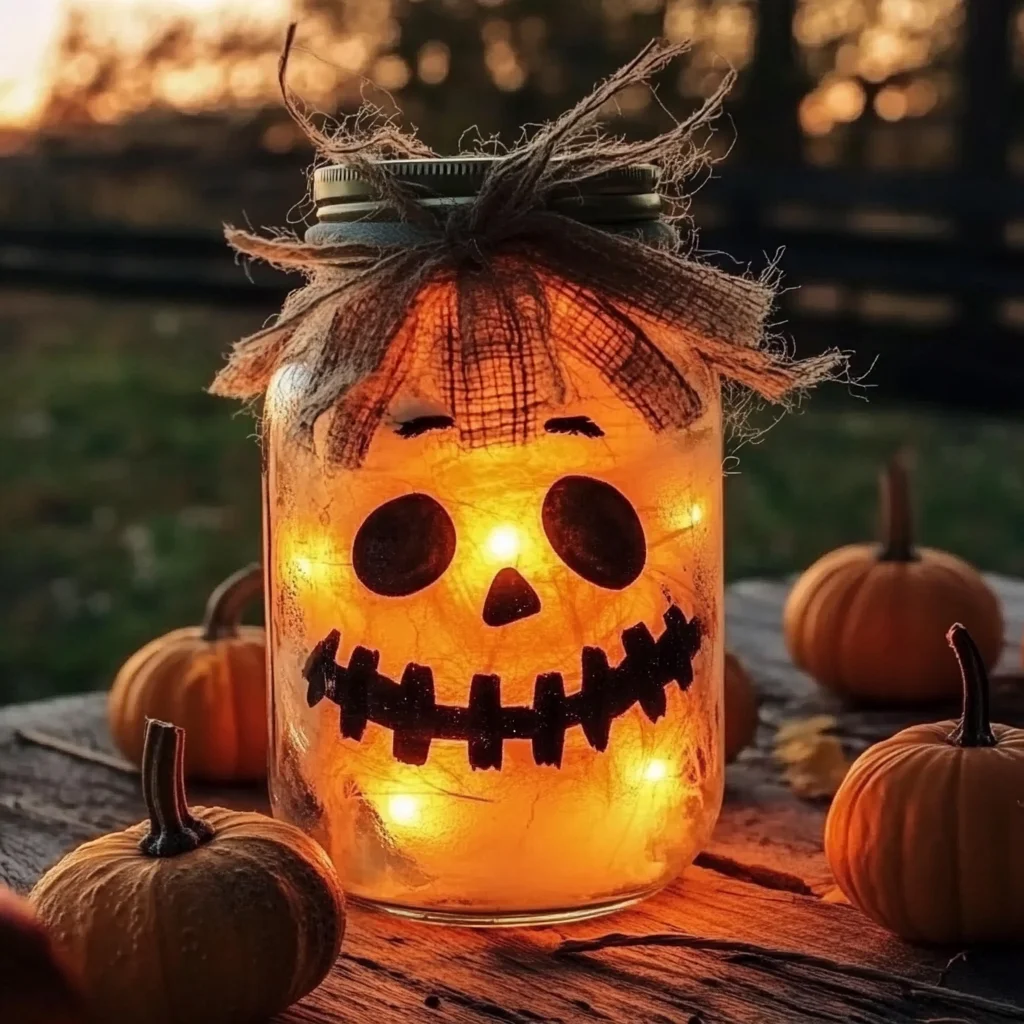
- Give Your Jar a Sunny Glow: First things first, you’ll want to give your mason jar its beautiful orange hue. Tear your orange tissue paper into small, irregular pieces. Using a paintbrush, brush a layer of Mod Podge onto a section of your clean mason jar. Now, carefully layer the tissue paper pieces over the wet Mod Podge, overlapping them slightly. Continue this process until the entire surface of the jar is covered. Don’t worry if it looks a little messy at first; it dries clear! Once fully covered, let your jar dry completely. I usually give it at least an hour, or even two, just to be sure.
- Bring Your Scarecrow to Life with a Face: This is where your scarecrow gets its personality! From your black construction paper or vinyl, cut out shapes for two eyes, a triangle or square for a nose, and a simple stitched smile. Think classic scarecrow vibes! Once cut, adhere these shapes to the dried, orange jar using a little Mod Podge or clear-drying glue. Press them down firmly to ensure they stick well.
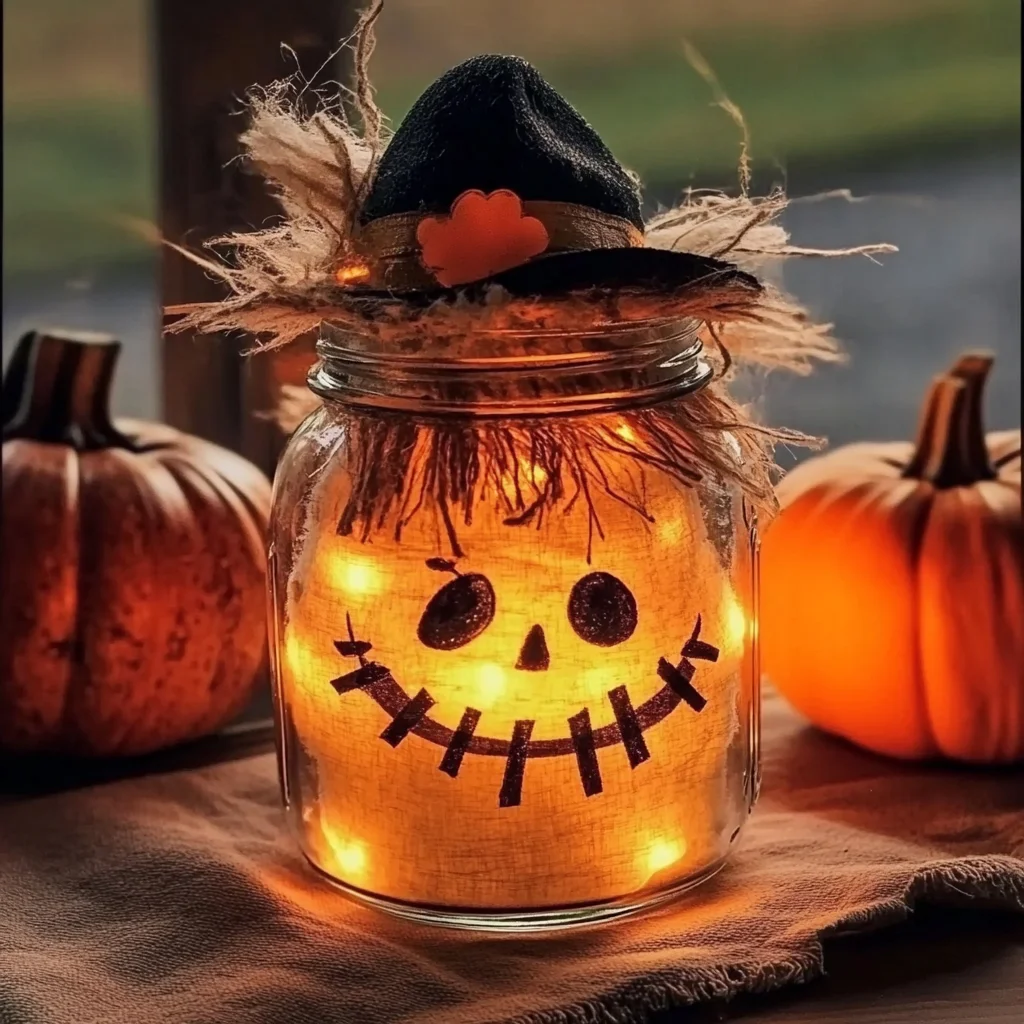
- Fashion a Hat and Hair: Every good scarecrow needs a hat! Take a strip of burlap (about 1.5 to 2 inches wide, depending on your jar size) and wrap it around the rim of your jar’s lid. Secure it in place with a few dots of hot glue. Next, grab a tuft of raffia or some extra burlap strips and hot glue them to the top of the burlap hat, letting them peek out like cheerful scarecrow hair.
- Add a Cozy Scarf and Embellishments: Now for the finishing touches! Tie a piece of twine or a thin burlap ribbon around the neck of the jar, just below the lid, to create a rustic scarf. You can tie it in a simple knot or a little bow. This is also the perfect spot to hot glue any optional fall-themed embellishments you like, such as a small cinnamon stick for a warm scent, a button, or a dried star anise for an extra touch of autumn magic. If you’re looking for other fun fall-themed ideas, especially for a treat to enjoy while crafting, you might love these delicious pumpkin mug cakes!
- Light It Up!: The grand finale! Carefully drop your battery-operated tea light or string of fairy lights into the jar. Switch them on, and watch your adorable light-up scarecrow come to life with a warm, inviting glow. It’s truly magical!
Substitutions & Additions
Feel free to get creative and make these scarecrow jars uniquely yours!
- No Tissue Paper? No Problem! Instead of tissue paper, you can use orange or amber glass paint (like acrylic craft paint specifically for glass) to coat the inside or outside of your jar. Just follow the paint’s drying instructions.
- Face Alternatives: If you don’t have black paper or vinyl, a permanent black marker or black paint pen can work perfectly for drawing on the face.
- Hair & Scarf Swaps: Don’t have burlap or raffia? Get creative with thick yarn in autumnal colors, strips of flannel fabric, or even natural twine for a different texture.
- Outdoor Glow: For an outdoor-friendly version, consider using solar-powered fairy lights that have a small panel you can place outside the jar. Just make sure the jar itself is sheltered from rain.
- Extra Fall Charm: Tuck in a few faux autumn leaves, small twigs, dried acorns, or even mini pinecones around the base of the jar for an extra touch of nature.
- Halloween Twist: For a more spooky touch, use purple or green tissue paper and cut out jagged teeth instead of a smile! And if you’re planning a Halloween gathering, these jars would pair perfectly with some spooky Hocus Pocus Punch! Or, for a truly eerie treat, why not whip up some Oreo Eyeball Truffles to go alongside your glowing scarecrows?
Tips for Success
Making these scarecrow jars is pretty straightforward, but a few little pointers can ensure yours turn out perfectly:
- Cleanliness is Key: Make sure your mason jar is sparkling clean and completely dry before you start. Any grease or residue can prevent the Mod Podge from adhering properly.
- Patience with Mod Podge: Allow each layer of Mod Podge and tissue paper to dry thoroughly before moving on to the next step, especially before adding the face. This prevents smudging and ensures a clear finish.
- Hot Glue Caution: Hot glue can be, well, hot! Use it sparingly and carefully, applying small dots to secure your burlap and raffia. A low-temp hot glue gun is great for this if you have one.
- Test Your Lights: Always check your battery-operated lights beforehand to make sure they’re working. Nothing’s worse than finishing your craft only to find your lights are dim!
- Get the Kids Involved: This is a fantastic craft for kids (with adult supervision for the hot glue gun!). Let them tear the tissue paper and choose their scarecrow’s face.
How to Display & Care for Your Light-Up Scarecrow Mason Jars
Once your charming scarecrow jars are complete, you’ll want to show them off! Here’s how to keep them looking their best:
- Indoor Display: These jars are perfect for adorning your mantel, bookshelves, entryways, or as a centerpiece on your dining table.
- Sheltered Outdoor Spots: If you want to display them outside, place them on a covered porch, patio, or under an awning to protect them from rain and harsh elements, which could damage the Mod Podge and paper.
- Avoid Direct Sunlight: Over time, direct sunlight can cause the tissue paper to fade or the Mod Podge to become discolored. Keep them in a shaded spot indoors or out.
- Gentle Cleaning: To dust, simply wipe them gently with a soft, dry cloth. Avoid using water or harsh cleaners.
- Battery Life: Remember to switch off your battery-operated lights when not in use to conserve battery life. When the season is over, remove the batteries for long-term storage to prevent corrosion.
FAQs
- Q: Can I use real candles in these scarecrow jars?
- A: No, for safety reasons, please only use battery-operated tea lights or fairy lights. Real flames can be a fire hazard, especially with the paper and fabric elements.
- Q: How long does this craft typically take?
- A: The hands-on time is usually about 30-60 minutes, depending on how intricate you get with the face and embellishments. However, you’ll need to account for drying time for the Mod Podge, which can be an additional 1-2 hours or more.
- Q: What if my tissue paper wrinkles when I apply it?
- A: A few wrinkles add to the rustic charm, so don’t worry too much! If you want a smoother finish, use smaller pieces of tissue paper and gently smooth them down with your brush as you apply them.
- Q: Can I seal the outside of the jar for better durability?
- A: Yes, once all the Mod Podge and glue are completely dry, you can apply a clear acrylic sealer spray (matte or gloss finish, depending on your preference) to the entire jar. This will offer a bit more protection, especially if displaying in a humid area, but it won’t make it completely waterproof.
I hope you have the best time creating these charming Light-Up Scarecrow Mason Jars! They truly bring a little piece of autumn magic into your home. Happy crafting!
For more festive ideas and delicious recipes, be sure to follow us on Pinterest!
Light-Up Scarecrow Mason Jars
Ingredients
Equipment
Method
- Step 1: Give Your Jar a Sunny Glow: Tear orange tissue paper into small, irregular pieces. Brush Mod Podge onto a section of the clean mason jar. Layer tissue paper pieces over the wet Mod Podge, overlapping slightly, until the entire surface is covered. Let the jar dry completely (1-2 hours).
- Step 2: Bring Your Scarecrow to Life with a Face: Cut shapes for two eyes, a triangle or square nose, and a simple stitched smile from black construction paper or vinyl. Adhere these shapes to the dried, orange jar using Mod Podge or clear-drying glue, pressing firmly.
- Step 3: Fashion a Hat and Hair: Wrap a strip of burlap (1.5-2 inches wide) around the rim of the jar's lid and secure with hot glue. Hot glue a tuft of raffia or extra burlap strips to the top of the burlap hat, letting them peek out like hair.
- Step 4: Add a Cozy Scarf and Embellishments: Tie a piece of twine or thin burlap ribbon around the neck of the jar, just below the lid, to create a rustic scarf. Hot glue any optional fall-themed embellishments like a small cinnamon stick, button, or dried star anise.
- Step 5: Light It Up!: Carefully drop your battery-operated tea light or string of fairy lights into the jar. Switch them on to illuminate your scarecrow with a warm, inviting glow.