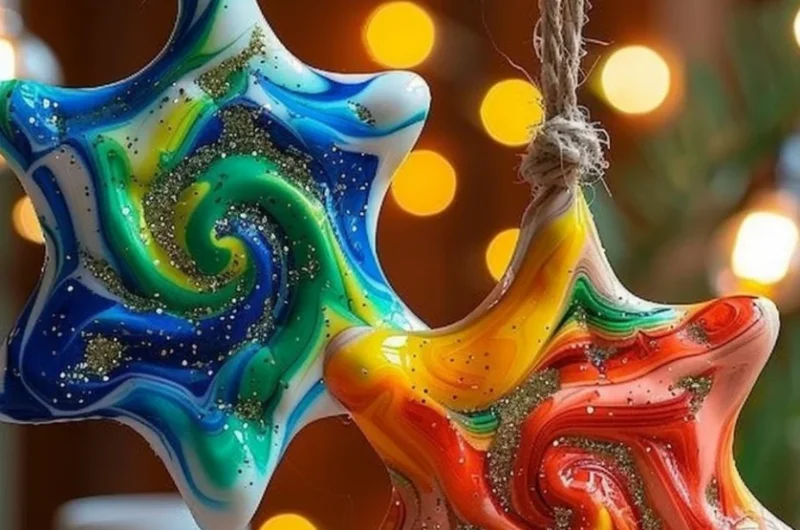
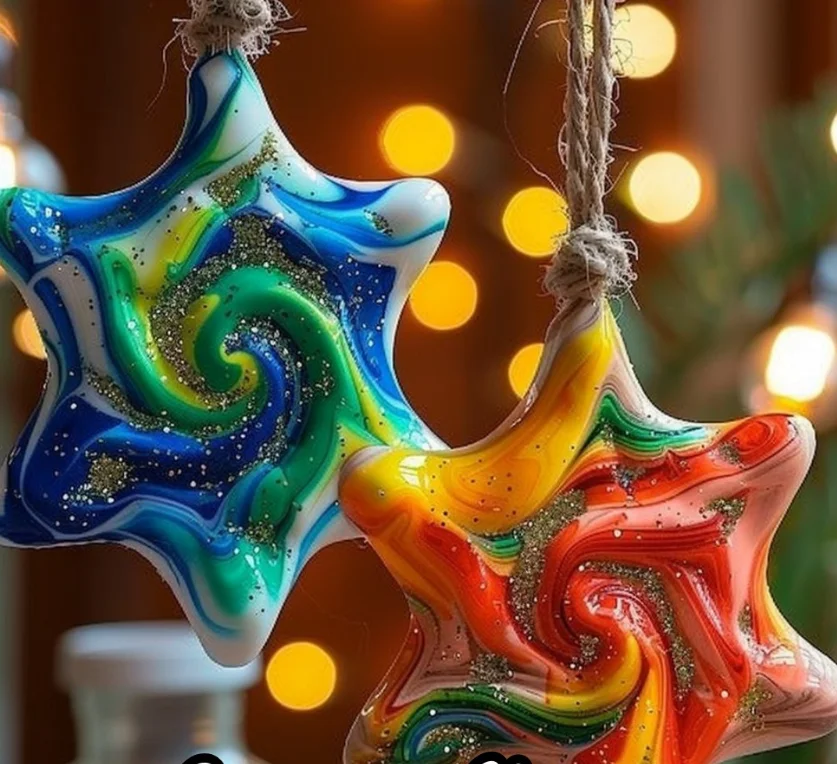
Oh, friend, do you ever find yourself gazing at a box of old crayons and feeling a little twinge of nostalgia? Those vibrant sticks of wax hold so many memories, don’t they? From scribbling masterpieces on construction paper to making countless coloring books come alive, crayons are pure childhood magic. Today, we’re tapping into that magic in a whole new way – not for drawing, but for creating the most charming, colorful, and utterly delightful Melted Crayon Star Decorations!
This isn’t just a craft; it’s a little burst of joy waiting to happen. Imagine transforming those broken, forgotten crayon nubs into luminous, starry keepsakes. It’s so easy, wonderfully quick, and incredibly satisfying. Whether you’re looking for a fun rainy-day activity with the kids (with a little adult help, of course!), a thoughtful handmade gift, or just a way to add a pop of cheerful color to your home, these melted crayon stars are absolutely perfect. Seriously, if you love easy no-bake treats, you’re going to adore how effortlessly these come together!
Why You’ll Love Melted Crayon Star Decorations
- Fast: From crayon shaving to hanging star in no time at all. Instant gratification, my friends!
- Easy: No fancy skills or complicated techniques required. If you can use an iron (with supervision!), you can make these.
- Giftable: Hand-crafted and heartfelt, these make perfect little presents for teachers, grandparents, or holiday exchanges. They’re just as cheerful and appreciated as a batch of homemade strawberry crunch cookies!
- Crowd-pleasing: Kids and adults alike will be enchanted by the process and the vibrant results.
Ingredients
Gather your supplies, and let’s get crafty! Most of these you probably already have lying around, making this a super accessible project.
- Crayons: The stars of our show! Any brand, any color. This is a fantastic way to use up those broken bits and pieces. The more variety, the merrier!
- Wax Paper: This is the canvas for your melted masterpiece. It’s what holds all those colorful crayon shavings in place.
- Parchment Paper: Your iron’s best friend! This protects your iron from any stray wax and helps distribute heat evenly.
- Baker’s Twine (or ribbon/string): For hanging your beautiful stars. Choose colors that complement your melted crayon art!
- Scissors: For cutting out your star shapes and the twine.
- Crayon Sharpener or Knife: To get those lovely, delicate crayon shavings. A regular pencil sharpener works wonders for smaller crayons, or a simple paring knife for bigger ones (adult supervision a must!).
- Iron (with adult supervision): Our melting maestro! A standard household iron on a low setting is all you need.
- Star Stencil or Cookie Cutter: For creating those perfectly shaped stars. You can freehand it too if you’re feeling adventurous!
- Hole Punch: Makes it easy to thread your twine for hanging.
How to Make Melted Crayon Star Decorations
Alright, let’s get our hands a little waxy and create some magic! Just follow these simple steps, and you’ll have a starry display in no time.
- Unwrap Those Crayons: First things first, peel all the paper wrappers off your chosen crayons. This is a great task for little hands to help with! The naked crayons are ready for their transformation.
- Shave ‘Em Down: Now, for the fun part! Using a crayon sharpener or a knife (and please, adult supervision is key here, especially with a knife!), shave your crayons into small bits. Think sprinkles or confetti. The smaller the shavings, the smoother your melted design will be. I love mixing different shades of the same color, like light blue and dark blue, or going wild with a rainbow of colors!
- Spread the Shavings: Lay out a sheet of wax paper on a protected surface (an old towel or cutting board works great). Evenly spread your crayon shavings onto one half of the wax paper. Don’t go too thick, or it’ll take longer to melt. This is where your creativity shines – arrange the colors however you like! Maybe stripes, a swirl, or just a random explosion of color, much like the fun you can have with colorful Muddy Buddies.
- Seal the Magic Packet: Fold the other half of the wax paper over the crayon shavings. Gently press down on the edges to seal them, creating a little enclosed packet. You want to make sure the shavings are fully contained.
- Parchment Paper Sandwich: Place your wax paper packet between two sheets of parchment paper. This is super important to protect your iron from any melting wax.
- Iron with Care: With adult supervision (seriously, no kiddos using the hot iron!), set your iron to a low heat setting – no steam! Gently glide the iron over the top layer of parchment paper. You’ll see the colors start to blend and melt through the wax paper. Keep the iron moving slowly and evenly. If it’s not melting, gradually increase the heat, but always start low to prevent scorching the wax.
- Cool & Harden: Once all the crayon shavings are melted and blended to your liking, remove the parchment paper and let your melted crayon wax cool and harden completely. This usually only takes a few minutes. You can even pop it in the fridge for a minute or two if you’re impatient like me!
- Shape Your Stars: Once cool, grab your star stencil or cookie cutter. Place it over the hardened crayon wax and trace around it, or press down firmly with the cookie cutter to cut out your star shapes. Carefully cut out your stars with scissors.
- Punch a Hole: Using your hole punch, make a small hole at the top of each star. This is where your hanger will go!
- Thread & Hang: Cut a piece of baker’s twine (about 6-8 inches long, or whatever length you prefer) and thread it through the hole. Tie the ends together in a knot, and voilà! Your beautiful melted crayon star decorations are ready to hang and admire.
Substitutions & Additions
This craft is so versatile, you can totally make it your own!
- Shapes Galore: Don’t limit yourself to stars! Use any cookie cutters you have – hearts, circles, animals, even letters! Imagine personalized initial ornaments!
- Sparkle & Shine: For a touch of glitter, sprinkle a tiny bit of fine craft glitter onto your crayon shavings before you fold the wax paper over. It’ll melt right into the wax for a magical shimmer.
- Creative Hangers: Instead of baker’s twine, try thin ribbon, fishing line for an invisible look, or even colorful yarn.
- Thicker for Coasters: If you use more crayon shavings and iron them into a thicker layer, you can create unique, colorful coasters! Just make sure to use a sealant to protect them from moisture.
- Magnets or Pins: Skip the hole and glue a small magnet to the back for fridge art, or a pin for a fun brooch!
Tips for Success
Even though this craft is super simple, a few little pointers can make all the difference!
- Even Shavings for Even Melting: Try to get your crayon shavings roughly the same size. This helps them melt uniformly and prevents lumpy spots in your finished stars.
- Start Low on the Heat: Always begin with your iron on the lowest setting. You can always increase it, but it’s hard to un-scorch wax! Patience is a virtue here.
- Protect Your Surface: Always work on a heat-safe surface, like an ironing board or a countertop protected by a thick towel.
- Clean Iron is a Happy Iron: Make sure your iron’s plate is clean before you start. Any residue could transfer to your parchment paper (and potentially your wax). If you accidentally get wax on your iron, unplug it, let it cool completely, then gently rub off the wax with a soft cloth. For stubborn bits, you can iron over a paper towel with a sprinkle of salt.
- Adult Supervision, Always: I can’t stress this enough! While kids can do most of the steps, handling the sharp knife/sharpener and the hot iron is strictly an adult job.
How to Store Melted Crayon Star Decorations
These little beauties are pretty durable, but a little care in storage will keep them looking vibrant for years to come!
- Keep Them Flat: Store your melted crayon stars flat to prevent bending or warping.
- Layer with Protection: If stacking, place a sheet of wax paper or tissue paper between each star to prevent them from sticking together, especially in warmer temperatures.
- Avoid Heat & Sunlight: The key ingredient here is melted wax, so keep your finished decorations away from direct sunlight, hot windows, or heat sources, as they can melt and lose their shape. A cool, dry place like a storage box in a closet is ideal.
- Shelf Life: Stored properly, these decorations will last indefinitely! They’re truly a timeless craft.
FAQs
Q: Can I use old, broken crayons for this craft?
A: Absolutely! This is the perfect project for repurposing those stubby, broken crayons that are too small to color with. It gives them a new lease on life!
Q: My crayon shavings aren’t melting evenly. What should I do?
A: Make sure your crayon shavings are fairly uniform in size and spread evenly. Also, try gently pressing down a bit more with the iron and moving it slowly to allow the heat to penetrate and melt all the wax consistently.
Q: Is this craft safe for young children?
A: With adult supervision, yes! Kids can easily help peel wrappers and spread shavings. The shaving and ironing steps require adult handling to ensure safety due to sharp tools and hot appliances.
Q: What if I don’t have a star-shaped cookie cutter?
A: No problem! You can freehand cut other shapes, or even use the rim of a small glass to trace circles. Get creative with whatever shapes you have around!
I hope you have the most wonderful time creating these gorgeous melted crayon star decorations! They truly add a touch of handmade charm and a pop of color wherever you hang them. Happy crafting, friends!
For more fun, family-friendly ideas and delicious recipes, be sure to follow us on Pinterest!
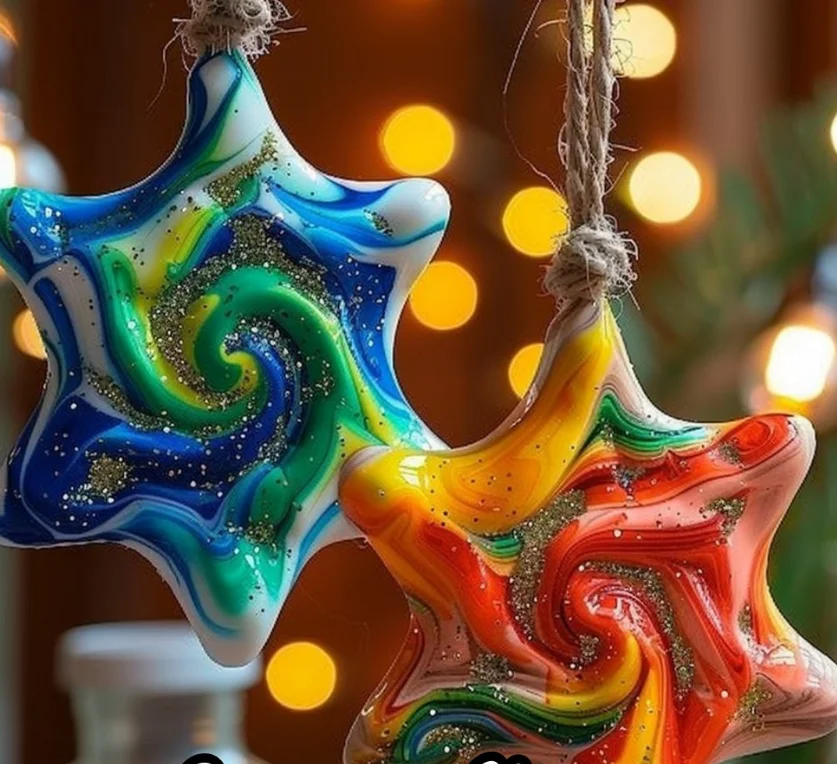
Melted Crayon Star Decorations
Ingredients
Equipment
Method
- Step 1: Unwrap the paper wrappers off your chosen crayons. This is a great task for little hands to help with.
- Step 2: Using a crayon sharpener or a knife (adult supervision is key!), shave your crayons into small bits, like sprinkles or confetti. The smaller the shavings, the smoother your melted design will be. Mix different shades or a rainbow of colors.
- Step 3: Lay out a sheet of wax paper on a protected surface. Evenly spread your crayon shavings onto one half of the wax paper. Don't go too thick, or it'll take longer to melt.
- Step 4: Fold the other half of the wax paper over the crayon shavings. Gently press down on the edges to seal them, creating a little enclosed packet.
- Step 5: Place your wax paper packet between two sheets of parchment paper. This is super important to protect your iron from any melting wax.
- Step 6: With adult supervision, set your iron to a low heat setting (no steam!). Gently glide the iron over the top layer of parchment paper, keeping it moving slowly and evenly. You'll see the colors start to blend and melt. If not melting, gradually increase heat, always starting low to prevent scorching.
- Step 7: Once all the crayon shavings are melted and blended, remove the parchment paper and let your melted crayon wax cool and harden completely (a few minutes, or pop in the fridge briefly).
- Step 8: Once cool, grab your star stencil or cookie cutter. Place it over the hardened crayon wax and trace around it, or press down firmly to cut out your star shapes. Carefully cut out your stars with scissors.
- Step 9: Using your hole punch, make a small hole at the top of each star for the hanger.
- Step 10: Cut a piece of baker's twine (about 6-8 inches or desired length) and thread it through the hole. Tie the ends together in a knot. Your beautiful melted crayon star decorations are ready to hang.