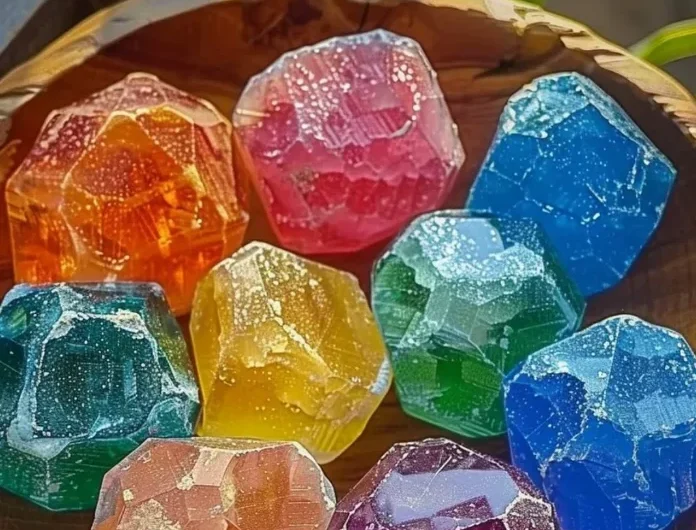
Oh, honey, do you remember those childhood days filled with wonder? The kind where every rock in the backyard held a secret, and every craft project felt like pure magic? Well, today, we’re bringing a little bit of that enchantment right into your kitchen with something truly special: DIY Color Changing Crystal Treasure Stones!
This isn’t just a craft; it’s an experience. Imagine the delighted squeals when these beautiful, homemade “gems” burst into a delightful fizz. It’s incredibly easy, surprisingly quick, and makes for the most memorable afternoon activity, whether you’re entertaining little ones or just tapping into your own inner child. Get ready to create some sparkle!
Why You’ll Love Color Changing Crystal Treasure Stones
- Fast: Mix, mold, and dry – it’s that simple!
- Easy: Just three basic ingredients you probably already have.
- Giftable: Perfect for little treasure hunters or as unique party favors.
- Crowd-pleasing: A dazzling activity that entertains kids (and adults!) of all ages.
Ingredients
- 1/2 cup baking soda: This is our magic powder, the star of our fizzy show!
- 1/4 cup water: Just good ol’ tap water to bring everything together.
- Food coloring (multiple colors): The fun part! Grab all your favorite hues – reds, blues, greens, yellows – the more, the merrier!
How to Make Color Changing Crystal Treasure Stones
Alright, let’s get our hands a little dirty and make some dazzling treasures! Follow these simple steps, and you’ll be sparkling in no time.
- First things first, grab a good-sized mixing bowl. You’ll want enough space to get in there and mix. Measure out your 1/2 cup of baking soda and pop it right in.
- Next, slowly pour in your 1/4 cup of water. Now, with a spoon or spatula (I love using a sturdy rubber spatula for this!), start mixing it all up. You’re aiming for a thick, dough-like paste. If it feels a little too crumbly, add a tiny splash more water, like a teaspoon at a time, until it comes together. Don’t add too much, or it’ll be soupy!
- Time for the rainbow magic! Divide your paste into separate, smaller bowls – one for each color you want to create. This is where the real fun begins!
- Add a few drops of your chosen food coloring to each bowl. Now, stir, stir, stir! Keep mixing until the color is beautifully and evenly blended throughout the paste. Don’t be shy; if you want a really vibrant gem, add a few more drops!
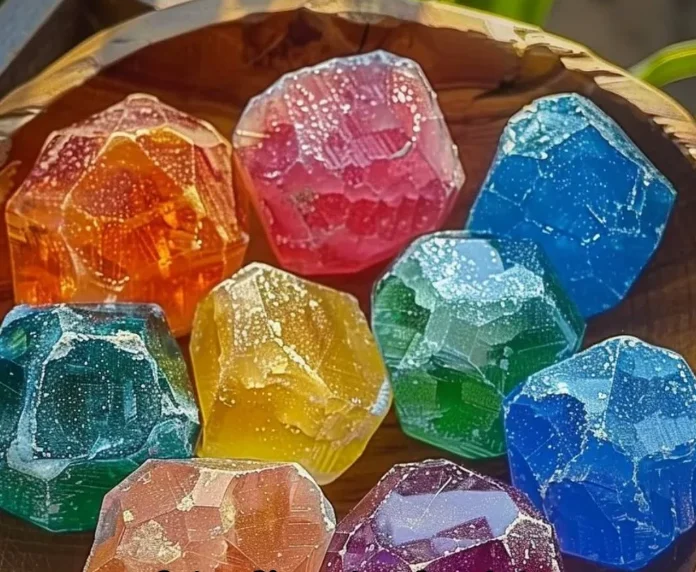
- Now for the shaping! Scoop out portions of your colored paste. This is where you can get really creative. Roll them into balls, flatten them into discs, or pinch and press them into jagged, crystal-like forms. Think like you’re creating little jewels from a pirate’s chest! As you shape them, place your gorgeous creations onto a baking sheet lined with parchment paper. This will prevent sticking and make for easy cleanup.
- This step requires a little patience, my friend. You need to let your beautiful stones dry completely. Depending on how humid your home is and how thick your stones are, this could take several hours or even overnight. I usually leave mine on the counter overnight to ensure they’re rock-hard and ready for action.
- Once your crystal treasure stones are fully hardened, they are ready for play! For an extra special, totally magical touch, grab some white vinegar. When you’re ready for the big reveal, simply drizzle a little bit of vinegar over your stones and watch the delightful fizzing reaction! It’s like a mini science experiment and a treasure hunt all rolled into one! If you’re looking for more science fun, you might enjoy our Baking Soda Vinegar Balloon Experiment – it uses some of the same core principles!
Substitutions & Additions
Part of the joy of DIY is making it your own! Here are some fun ways to switch things up:
- Natural Dyes: If you’re looking for an alternative to artificial food coloring, try using natural dyes like beet juice for pink, turmeric for yellow, or spirulina for green. The colors might be a bit more muted, but they’ll still be lovely!
- Glitter & Sparkle: For truly dazzling treasure stones, mix a pinch of biodegradable craft glitter into your paste before shaping. You can also sprinkle a little extra on top before they dry for an added shimmer!
- Hidden Surprises: Want to add an extra layer of excitement? Press a tiny toy, a small coin, or even a sparkly bead into the center of your paste before shaping. Kids will love “excavating” their treasures when they fizz!
- Scented Stones: Add a drop or two of kid-safe essential oil (like lavender or orange) to each colored paste for a sensory experience. Just be sure to use a very small amount and ensure it’s safe for skin contact.
- Different Molds: While free-forming is fun, you can also press the paste into silicone candy molds, ice cube trays, or even small cookie cutters for perfectly shaped gems.
Tips for Success
Making these treasure stones is super easy, but a few little pointers can make them even better!
- Don’t Rush the Drying: This is probably the most common “mistake.” If your stones aren’t completely dry, they might crumble when you try to handle them or won’t fizz as dramatically. Give them ample time, especially if they’re thick.
- Consistency is Key: Aim for a paste that’s firm enough to hold its shape but not too dry that it crumbles. If it’s too wet, add a little more baking soda; too dry, a tiny bit more water. It’s a bit like playing with playdough!
- Parchment Paper is Your Friend: Seriously, don’t skip this. It makes sure your stones don’t stick to your baking sheet and cleanup is a breeze.
- Make a Variety: Don’t just stick to one color or shape! Create a whole rainbow of treasures in different sizes for a truly impressive collection. You could even make a batch of these and then whip up some DIY Suncatchers for another easy, fun craft day!
- Sensory Bin Fun: Once dry, these stones are fantastic for a sensory bin. Combine them with sand, scoops, and small shovels for a digging adventure, then bring out the vinegar for the grand finale.
How to Store Color Changing Crystal Treasure Stones
Once your beautiful crystal treasure stones are completely dry and hardened, storage is a cinch!
Simply keep them in an airtight container at room temperature. A plastic container, a glass jar with a lid, or even a ziploc bag works perfectly. The most important thing is to keep them away from any moisture, as water (or vinegar!) will start the fizzing reaction, and we want to save that for the big moment! Stored properly, these gems will last indefinitely, ready for a rainy-day activity whenever you are!
FAQs
Got a few questions bubbling up? Let’s answer them!
Q: How do these stones “change color”?
A: Great question! The “color changing” part refers to how you get to create them in any color you desire using food coloring! The real magic, however, happens when you add vinegar, which causes a fizzy, bubbling reaction due to the baking soda. It’s a wonderful little science lesson and a treat for the eyes!
Q: Can I use different liquids besides vinegar for the fizzing reaction?
A: For the best and safest fizzing reaction, white vinegar is your go-to! It reacts with the baking soda to create carbon dioxide bubbles, which is what gives you that satisfying sparkle. Other acidic liquids might work, but vinegar is the most reliable and readily available for this type of experiment.
Q: Are these crystal treasure stones safe for young children?
A: Yes, the ingredients are generally safe and non-toxic! However, like with any craft, adult supervision is always recommended, especially for very young children, to ensure they don’t ingest large amounts of the paste or dried stones. The vinegar is also safe but can be irritating if it gets in eyes, so keep a watchful eye! If you’re looking for another kid-friendly activity, our recipe for Easy 3-Ingredient Slime is always a huge hit!
Q: What if my paste is too sticky or too dry?
A: Don’t fret, this is an easy fix! If your paste feels too sticky and hard to handle, add a small amount (a teaspoon at a time) of extra baking soda and mix well. If it’s too dry and crumbly, add a tiny bit (a half-teaspoon at a time) of water until you reach a playdough-like consistency.
Don’t forget to follow us on Pinterest for more delightful recipes and craft ideas!
Sparkle & Fizz: Easy DIY Color Changing Crystal Treasure Stones for Endless Fun!
Ingredients
Equipment
Method
- Step 1: Grab a good-sized mixing bowl. Measure out your 1/2 cup of baking soda and pop it right in.
- Step 2: Slowly pour in your 1/4 cup of water. With a spoon or spatula, start mixing it all up. Aim for a thick, dough-like paste. If it feels a little too crumbly, add a tiny splash more water (like a teaspoon at a time) until it comes together. Don't add too much, or it'll be soupy!
- Step 3: Divide your paste into separate, smaller bowls – one for each color you want to create.
- Step 4: Add a few drops of your chosen food coloring to each bowl. Stir until the color is beautifully and evenly blended throughout the paste. For a really vibrant gem, add a few more drops!
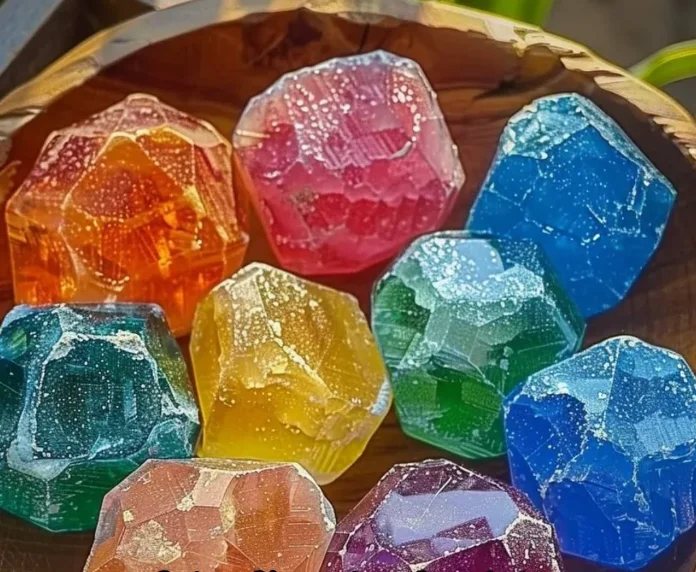
- Step 5: Scoop out portions of your colored paste. Roll them into balls, flatten them into discs, or pinch and press them into jagged, crystal-like forms. As you shape them, place your creations onto a baking sheet lined with parchment paper.
- Step 6: Let your beautiful stones dry completely. Depending on how humid your home is and how thick your stones are, this could take several hours or even overnight. It's recommended to leave them on the counter overnight to ensure they're rock-hard and ready for action.
- Step 7: Once your crystal treasure stones are fully hardened, they are ready for play! For an extra special, magical touch, grab some white vinegar. When you're ready for the big reveal, simply drizzle a little bit of vinegar over your stones and watch the delightful fizzing reaction!