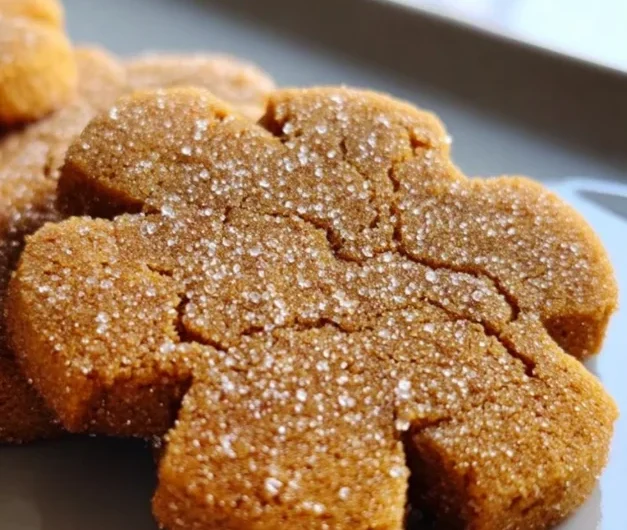
There’s just something magical about autumn, isn’t there? The crisp air, the vibrant leaves, and that undeniable craving for all things cozy and spiced. For me, nothing says ‘fall is here!’ quite like the aroma of pumpkin and cinnamon wafting from the oven. It instantly transports me back to childhood memories of baking with my grandma, her kitchen always filled with warmth and the sweet scent of cinnamon.
And today, my friend, I’m sharing a recipe that captures that magic perfectly, without any fuss: my absolute favorite Pumpkin-Spice Sugar Cookies. They’re incredibly easy to whip up, shockingly quick to bake, and they deliver that irresistible chewy texture with every single bite. These aren’t your average thin, crispy sugar cookies; these are plump, soft, and bursting with all the warm, comforting flavors of pumpkin spice. Trust me, once you try them, they’ll become a fall baking tradition in your home too! Plus, if you love that comforting spiced flavor, you might also adore making an ultimate classic carrot cake for another special occasion.
Why You’ll Love Pumpkin-Spice Sugar Cookies
- Fast: From mixing bowl to cooling rack in under 30 minutes!
- Easy: Simple ingredients and straightforward steps make this a breeze for bakers of all levels.
- Giftable: Package them up for friends, neighbors, or as a thoughtful hostess gift. Everyone loves homemade cookies!
- Crowd-pleasing: The perfect blend of sweet and spice, these cookies are a hit with kids and adults alike.
Ingredients
Gathering your ingredients is the first step to deliciousness! Here’s what you’ll need:
- 1/2 cup (1 stick) unsalted butter, softened: Make sure it’s properly softened (but not melted!) for that perfect creamy texture when you mix it with the sugar. It should yield slightly when pressed.
- 1 cup granulated sugar: Our main sweetener, giving these cookies their classic sugar cookie base.
- 1 large egg: This helps bind everything together and adds richness.
- 1/2 cup canned pumpkin puree: The star of the show! Remember, this is pure pumpkin, not pumpkin pie filling.
- 1 teaspoon vanilla extract: A must-have for depth of flavor in any sweet treat.
- 2 1/4 cups all-purpose flour: The foundation of our cookie dough.
- 1/2 teaspoon baking soda: Helps with the cookie’s spread and tenderness.
- 1/4 teaspoon baking powder: Works with the baking soda to give our cookies that lovely soft, slightly puffy texture.
- 1/4 teaspoon salt: Don’t skip the salt! It balances the sweetness and enhances all the spice flavors.
- 1 teaspoon ground cinnamon: The classic fall spice.
- 1/2 teaspoon ground ginger: Adds a lovely warmth and subtle kick.
- 1/4 teaspoon ground nutmeg: Essential for that true “pumpkin spice” aroma.
- 1/4 teaspoon ground cloves: A little goes a long way to deepen the spice profile.
- 1/4 cup granulated sugar (for rolling): For that irresistible sweet, sparkly exterior.
- 1/2 teaspoon ground cinnamon (for rolling): Mixed with the sugar for an extra layer of spiced flavor and beautiful visual appeal.
How to Make Pumpkin-Spice Sugar Cookies
Okay, let’s get our hands a little floury and make some pure happiness! This process is super simple, I promise.
- Get Your Oven Ready: First things first, go ahead and preheat your oven to 350°F (175°C). While it’s warming up, grab a couple of baking sheets and line them with parchment paper. This makes cleanup a breeze and prevents sticking!
- Cream the Butter and Sugar: In a large mixing bowl, put your softened butter and the first cup of granulated sugar. Beat them together with an electric mixer (or a sturdy whisk if you’re feeling strong!) until the mixture is beautifully light and fluffy. This step incorporates air, which is key for soft cookies.
- Add the Wet Ingredients: Now, beat in the egg, that lovely pumpkin puree, and the vanilla extract. Keep mixing until everything is fully combined and looks smooth. It’s okay if it looks a little curdled at first, just keep going!
- Whisk the Dry Ingredients: In a separate bowl, whisk together the flour, baking soda, baking powder, salt, cinnamon, ginger, nutmeg, and cloves. Whisking ensures all those spices and leavening agents are evenly distributed throughout your cookies.
- Combine Wet and Dry: Gradually add the dry ingredients mixture into your wet ingredients bowl. Mix on low speed, or by hand, until a soft dough forms. Be careful not to overmix! As soon as the flour streaks disappear, stop. Overmixing can lead to tough cookies.
- Prepare the Rolling Mixture: Grab a small, shallow bowl and combine the 1/4 cup granulated sugar and 1/2 teaspoon cinnamon for rolling. This is what gives our cookies that gorgeous, sparkly finish and extra burst of flavor.
- Roll ‘Em Up: Now for the fun part! Scoop out tablespoon-sized portions of the dough. I like to use a cookie scoop for consistency, but a regular spoon works perfectly too. Roll each portion into a smooth ball between your palms, then drop it into the cinnamon sugar mixture. Roll it around until it’s beautifully coated on all sides.
- Space ‘Em Out: Place your coated dough balls onto your prepared baking sheets, making sure they’re about 2 inches apart. They’ll spread a little, so give them some room to breathe!
- Bake to Perfection: Pop your baking sheets into the preheated oven and bake for 10-12 minutes. You’ll know they’re ready when the edges are set and they’re just slightly golden. The centers might still look a little soft, and that’s exactly what we want for chewy cookies!
- Cool Down: Once baked, let those delightful cookies cool on the baking sheet for about 5 minutes. This helps them firm up a bit before you try to move them. After that, carefully transfer them to a wire rack to cool completely. Or, if you’re like me, snag one while it’s still warm – pure heaven!
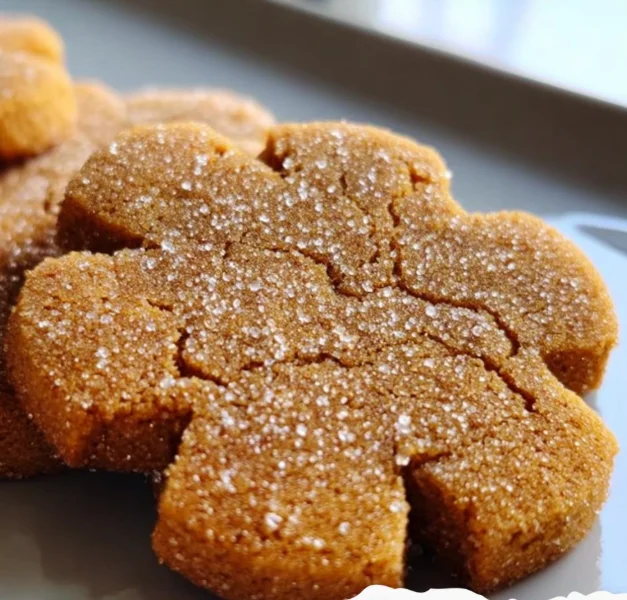
Substitutions & Additions
One of the best things about baking is making a recipe your own! Here are some ideas to shake things up:
- Gluten-Free: You can absolutely make these gluten-free! Simply swap out the all-purpose flour for a 1:1 gluten-free baking flour blend. I’ve had great success with Cup for Cup or Bob’s Red Mill 1:1 blends.
- Dairy-Free: Use your favorite plant-based butter (like Miyoko’s Kitchen or Earth Balance sticks) in place of unsalted butter for a dairy-free treat.
- Spice Adjustments: Feel free to play with the spice blend! Want more ginger? Go for it! Not a fan of cloves? Reduce or omit them. You can even add a pinch of allspice or cardamom for extra complexity.
- Chocolate Chips: White chocolate chips are a fantastic addition to these cookies! The creaminess of white chocolate pairs beautifully with the pumpkin spice. Dark chocolate or even butterscotch chips would also be delicious.
- Nuts: A handful of finely chopped pecans or walnuts would add a lovely texture and nutty flavor.
- Frosting Fun: While these cookies are perfect as is, a swirl of cream cheese frosting (like on my favorite carrot cake) would take them over the top! Or, for a simpler option, a quick glaze made from powdered sugar and a splash of milk or maple syrup.
Tips for Success
To ensure your Pumpkin-Spice Sugar Cookies turn out perfectly soft, chewy, and spiced every single time, keep these little secrets in mind:
- Butter Temperature is Key: Make sure your unsalted butter is genuinely softened, not melted or rock-hard. Softened butter creams beautifully with sugar, creating air pockets for a lighter, fluffier cookie. If it’s too soft, your cookies might spread too much.
- Don’t Overmix the Dough: Once you add the dry ingredients, mix just until combined. Overmixing develops the gluten in the flour, which can lead to tough, dense cookies instead of soft, chewy ones.
- Pumpkin Puree, Not Pie Filling: This is a common mistake! Canned pumpkin puree is just cooked, mashed pumpkin. Pumpkin pie filling has added spices and sweeteners. Using pie filling will throw off the flavor and texture of your cookies.
- Chill the Dough (Optional, but Recommended): If your dough seems a bit too sticky to roll, or if you have time, chilling it for 30 minutes to an hour in the refrigerator can make it much easier to handle and can also help prevent excessive spreading in the oven.
- Even Sizing Matters: Try to make your cookie dough balls as uniform in size as possible. This ensures they all bake evenly and are ready at the same time. A cookie scoop is your best friend here!
- Don’t Overbake! For that wonderfully soft and chewy texture, it’s crucial not to overbake these cookies. They might look slightly underdone in the center when you pull them out, but they will continue to cook and set as they cool on the hot baking sheet. A slightly golden edge is your cue.
- Prep Ahead: You can make the dough a day or two in advance and store it covered in the fridge. This is fantastic for busy schedules! Just let it sit at room temperature for about 15-20 minutes to soften slightly before rolling and baking. Speaking of pumpkin, if you love that flavor as much as I do, you might also enjoy making a comforting pumpkin banana loaf for breakfast or a snack!
How to Store Pumpkin-Spice Sugar Cookies
If you manage to have any left (which is a big “if” in my house!), here’s how to keep these pumpkin-spice beauties fresh:
- At Room Temperature: Store your cooled cookies in an airtight container at room temperature for up to 3-4 days. To keep them extra soft, you can place a slice of bread in the container with them – the cookies will absorb moisture from the bread.
- In the Refrigerator: While not strictly necessary, you can store them in an airtight container in the fridge for up to a week. Just bring them to room temperature or warm slightly before serving for the best texture.
- Freezing Baked Cookies: These cookies freeze beautifully! Once completely cooled, place them in a single layer on a baking sheet and freeze until solid. Then, transfer the frozen cookies to a freezer-safe bag or airtight container. They’ll stay fresh for up to 2-3 months. Thaw at room temperature when you’re ready to enjoy them.
- Freezing Dough: You can also freeze the raw cookie dough! Roll the dough into balls, coat them in the cinnamon sugar mixture, and then freeze them on a baking sheet. Once solid, transfer to a freezer-safe bag. When you’re ready to bake, place the frozen dough balls on a prepared baking sheet and bake for an extra 2-3 minutes, no need to thaw.
FAQs
Can I use fresh pumpkin instead of canned pumpkin puree?
Yes, you can! However, ensure that your homemade pumpkin puree is very thick and has as much moisture removed as possible. Excess moisture can make your cookies spread more and become less chewy. I usually stick with canned for convenience and consistent results.
Why are my cookies flat and not soft?
Flat cookies can be caused by a few things: your butter might have been too soft or melted when creaming, your oven temperature might be off (an oven thermometer can help!), or your leavening agents (baking soda/powder) might be old. Also, overmixing the dough can lead to a tougher, less soft cookie.
Can I make these cookies without rolling them in cinnamon sugar?
You certainly can! They’ll still be delicious and full of pumpkin spice flavor. However, that cinnamon sugar coating adds a wonderful sparkly crunch and an extra layer of sweetness that really elevates the cookie. I highly recommend it!
What if I don’t have all the individual spices? Can I use pre-made pumpkin pie spice?
Absolutely! If you don’t have individual cinnamon, ginger, nutmeg, and cloves, you can substitute them with 1 3/4 teaspoons of pre-made pumpkin pie spice mix. Just check the ingredients of your mix to make sure it contains all the warming spices you love. If you’re looking for even more pumpkin cookie goodness, you’ll love these soft batch pumpkin sugar cookies too!
Follow us on Pinterest for more delicious recipes!
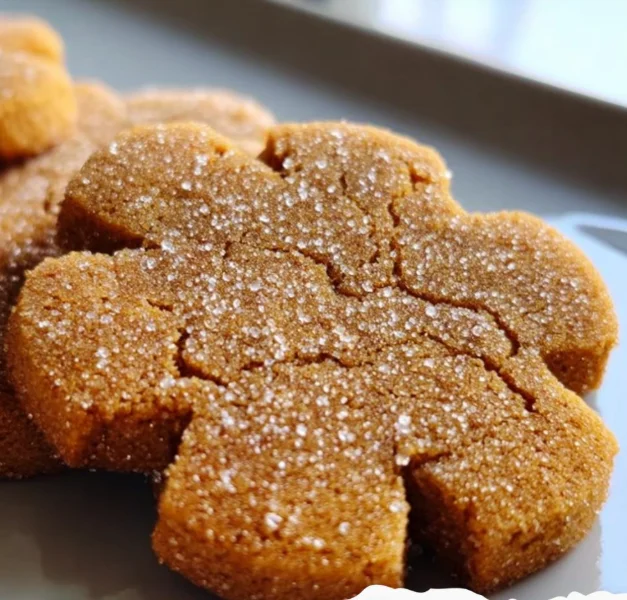
Soft & Chewy Pumpkin-Spice Sugar Cookies
Ingredients
Equipment
Method
- Step 1: Get Your Oven Ready: Preheat your oven to 350°F (175°C). Line a couple of baking sheets with parchment paper.
- Step 2: Cream the Butter and Sugar: In a large mixing bowl, beat softened butter and the first cup of granulated sugar with an electric mixer until light and fluffy.
- Step 3: Add the Wet Ingredients: Beat in the egg, pumpkin puree, and vanilla extract until fully combined and smooth.
- Step 4: Whisk the Dry Ingredients: In a separate bowl, whisk together the flour, baking soda, baking powder, salt, cinnamon, ginger, nutmeg, and cloves to ensure even distribution.
- Step 5: Combine Wet and Dry: Gradually add the dry ingredients to the wet mixture. Mix on low speed or by hand until a soft dough forms and flour streaks disappear. Do not overmix.
- Step 6: Prepare the Rolling Mixture: In a small, shallow bowl, combine 1/4 cup granulated sugar and 1/2 teaspoon cinnamon for rolling.
- Step 7: Roll 'Em Up: Scoop tablespoon-sized portions of dough, roll into smooth balls, then coat each ball thoroughly in the cinnamon sugar mixture.
- Step 8: Space 'Em Out: Place coated dough balls onto prepared baking sheets, ensuring they are about 2 inches apart to allow for spreading.
- Step 9: Bake to Perfection: Bake for 10-12 minutes, until the edges are set and slightly golden, and the centers still look a little soft for a chewy texture.
- Step 10: Cool Down: Let cookies cool on the baking sheet for 5 minutes, then transfer to a wire rack to cool completely. Enjoy warm if desired!