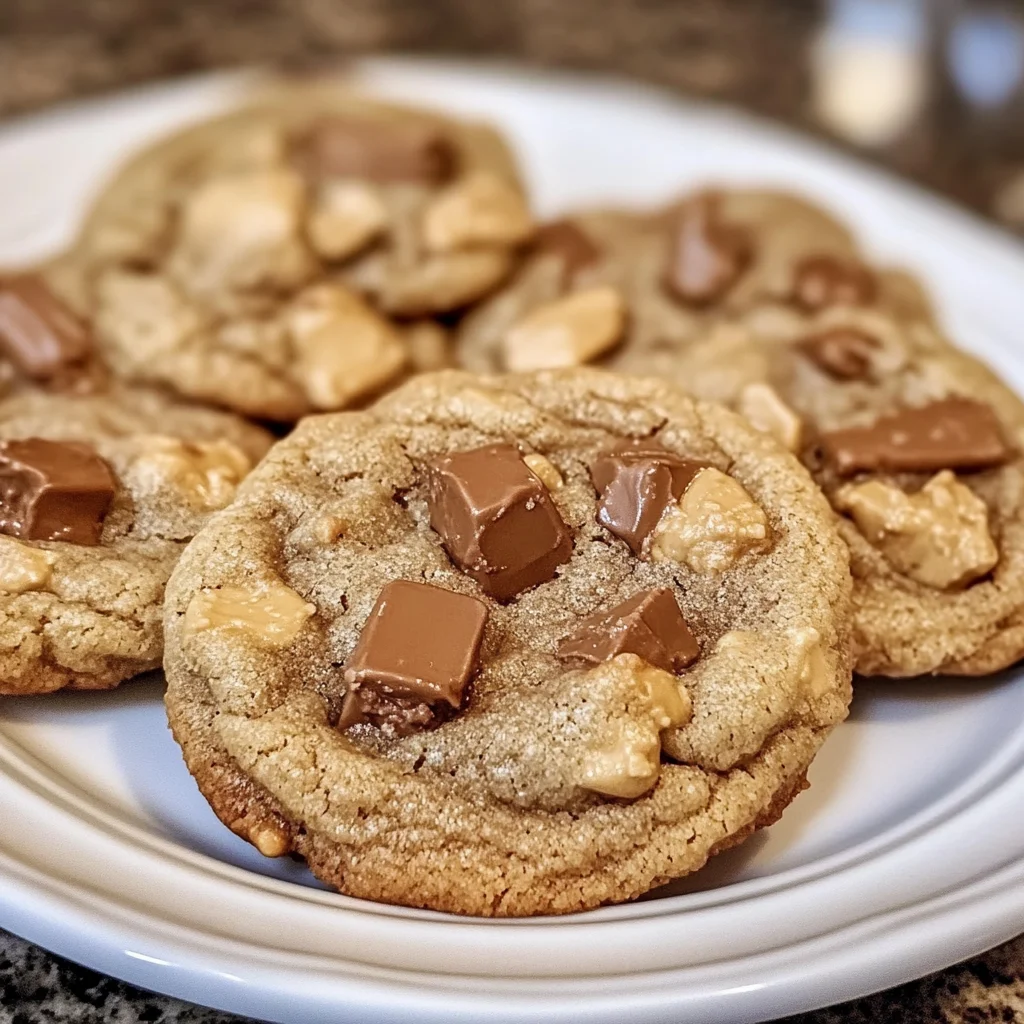
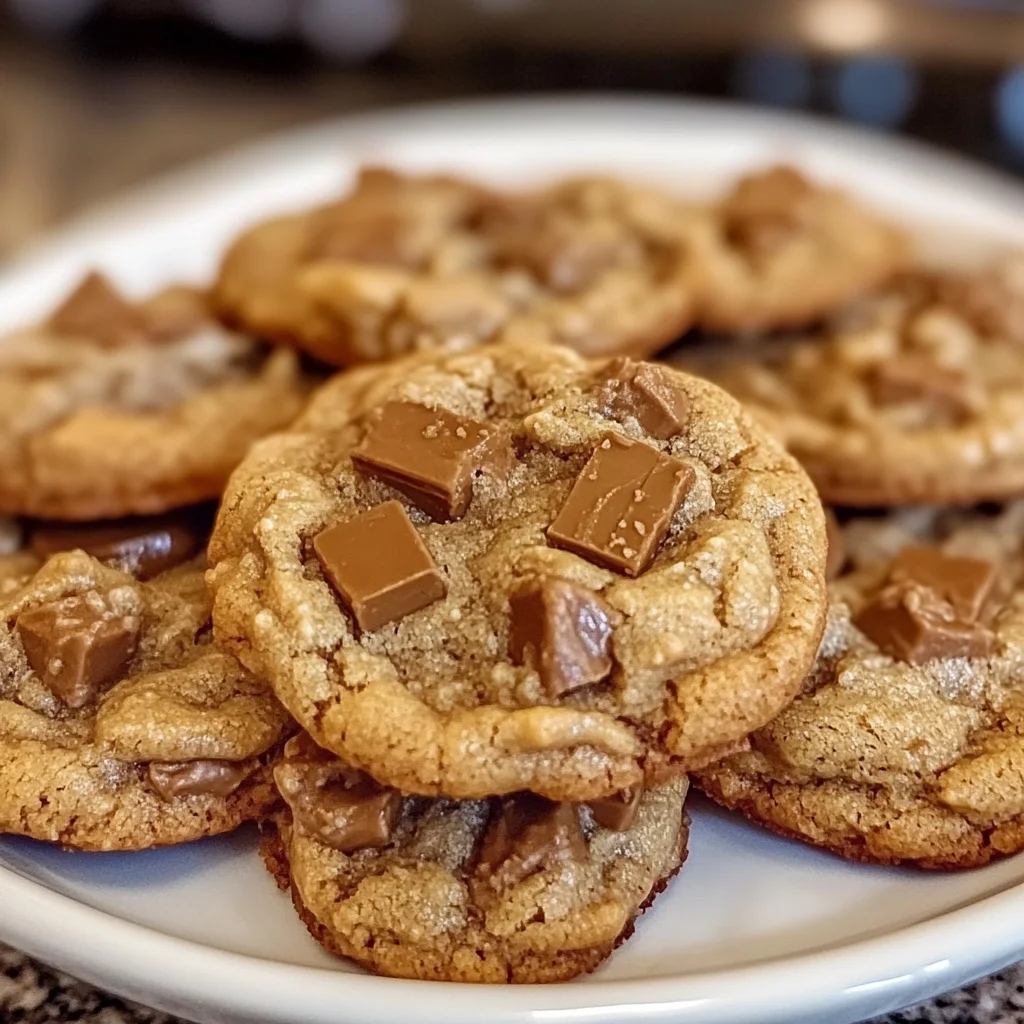
There’s something magical about the smell of freshly baked cookies wafting through the kitchen, isn’t there? Maybe it takes you back to childhood afternoons spent baking with a loved one, or maybe it’s just the comfort of knowing something warm, sweet, and homemade is waiting for you. Whatever your story, these Peanut Butter Butterfinger Cookies are bound to become a new favorite in your recipe collection. They combine the rich, creamy goodness of peanut butter with the crunchy, buttery candy bar pieces that bring a delightful surprise in every bite.
What I love most about this recipe is how simple it is to pull together, even on a busy weekday or a last-minute weekend craving. You don’t need a ton of fancy ingredients or complicated steps—just everyday pantry staples and a little bit of love. Plus, these cookies are perfectly giftable, making them great for sharing with friends, neighbors, or your kid’s teachers. Let’s dive into why these cookies deserve a spot on your baking list!
Why You’ll Love Peanut Butter Butterfinger Cookies
- Fast: You can whip up the dough in under 15 minutes, and the baking time is just about 10-12 minutes per batch.
- Easy: No fancy techniques or special equipment needed—just a mixer, a bowl, and a baking sheet.
- Giftable: These cookies have that charming homemade look with a candy twist, perfect for holiday tins or casual care packages.
- Crowd-pleasing: Peanut butter lovers and candy fans alike will be reaching for seconds. They’re perfect for cookie swaps, parties, or just treating yourself.
Ingredients
Before you get started, let’s take a look at the magic that goes into these cookies:
- Unsalted butter (¾ cup or 1½ sticks), softened: Butter gives these cookies a tender, rich crumb. Make sure it’s softened to room temperature for easy mixing.
- Granulated sugar (½ cup) and light brown sugar (½ cup): The combo of sugars adds sweetness and a subtle caramel flavor while keeping the texture just right.
- Creamy peanut butter (1 cup): This is the star ingredient that brings that classic peanut butter cookie flavor. Opt for creamy for the best texture.
- One large egg, at room temperature: Eggs bind everything together and add moisture.
- Pure vanilla extract (1½ teaspoons): Vanilla adds a lovely depth that complements the peanut butter and candy perfectly.
- All-purpose flour (1½ cups), spooned and leveled: This forms the base of the dough and keeps the cookies chewy yet structured.
- Baking soda (½ teaspoon) and baking powder (½ teaspoon): Both leavening agents help your cookies rise just enough for a soft, tender texture.
- Kosher salt (¼ teaspoon): A pinch of salt balances the sweetness and enhances all the flavors.
- Butterfinger candy (16 oz), chopped: The secret weapon! These crunchy, peanut butter-flavored candy bars add incredible texture and bursts of flavor throughout every cookie.
How to Make Peanut Butter Butterfinger Cookies
Ready to bake? Here’s the step-by-step guide to making these delightful cookies. Don’t worry, I’ll walk you through it!
- Beat the butter and sugars: Start by placing your softened butter into a large mixing bowl. Using a hand or stand mixer on medium speed, beat the butter until it’s smooth and creamy. Then add the granulated sugar and light brown sugar. Keep beating for about 2 minutes until the mixture turns light and fluffy. Don’t forget to scrape down the sides of the bowl so everything mixes evenly.
- Add peanut butter, egg, and vanilla: Next, add your creamy peanut butter to the bowl and beat until it’s fully combined with the butter and sugars. Then crack in the egg and pour in the vanilla extract. Mix everything together until the batter is smooth. Another scrape down the bowl here will make sure no bits are left behind.
- Incorporate the dry ingredients: Now, spoon your all-purpose flour directly over the wet mixture but don’t mix yet. Sprinkle the baking soda, baking powder, and kosher salt evenly over the flour. Gently stir these dry ingredients together on top with a spatula or wooden spoon. This helps distribute the leavening agents evenly before mixing.
- Mix the dough: Turn your mixer to low speed and mix just until the dough starts to come together. You’ll probably still see some streaks of flour—that’s okay! Stop the mixer and scrape down the bowl again to make sure everything is evenly combined.
- Fold in the Butterfinger candy: Time for the fun part! Gently fold the chopped Butterfinger candy into the dough with a spatula. You want the candy pieces to be evenly distributed without crushing them too much, so your cookies have that delightful crunch.
- Optional chilling: If you have a little extra time, cover the dough and refrigerate it for 30-60 minutes. This helps the cookies stay thick and chewy when baked. But if you’re in a hurry, you can bake right away—they’ll still be delicious!
- Prepare to bake: Preheat your oven to 350°F (175°C). Line two baking sheets with parchment paper to prevent sticking and make cleanup a breeze.
- Portion the dough: Using a large cookie scoop (about 2 tablespoons), scoop dough balls and place them on the lined baking sheets. Be sure to leave about 2 inches between each ball to allow for spreading.
- Bake: Bake one sheet at a time in the center of your oven for 10-12 minutes. You want the edges to be set and just turning golden, while the centers remain soft and slightly underbaked for that perfect chewy texture.
- Cool and finish: Let the cookies cool on the baking sheet for at least 10 minutes before moving them to a wire rack to cool completely. If you want, gently press the cookies down while they’re still warm or sprinkle a few extra chopped Butterfinger pieces on top for extra candy goodness.
And that’s it! You’ll be biting into these chewy, crunchy, peanut buttery cookies in no time. If you love peanut butter and candy, these cookies are a match made in heaven. If you’re a fan of other peanut butter classics, you might also want to check out my recipe for No-Bake Amish Peanut Butter Pie, which is a creamy, no-fuss dessert that’s perfect for warm days.
Substitutions & Additions
Feel free to get creative with this recipe! Here are some ideas if you want to switch things up or add your own special touch:
- Butterfinger substitute: If Butterfinger candy isn’t your thing or hard to find, chopped Heath bars or peanut butter cups are great alternatives that add similar crunch and flavor.
- Peanut butter options: Try natural peanut butter for a more rustic, less sweet flavor, or swap for almond butter if you want a nutty twist.
- Make it chocolatey: Add ½ cup of chocolate chips or chunks to the dough along with the candy for an extra chocolate boost.
- For extra chewiness: Toss in ½ cup of old-fashioned oats for a heartier texture.
- Nut allergy friendly: You can omit the peanut butter and candy bars and replace with sunflower seed butter and allergy-friendly chocolate chips. The texture will differ, but it’s still tasty!
Also, if you’re interested in other peanut butter treats, you might enjoy the soft and chewy texture of my Soft Chewy Pumpkin Spice Sugar Cookies, which bring seasonal flavors to your cookie jar.
Tips for Success
From my experience, here are some handy tips to make sure your Peanut Butter Butterfinger Cookies come out perfect every time:
- Don’t skip softening the butter: It helps everything cream together smoothly for a tender cookie.
- Measure flour carefully: Spoon and level your flour instead of scooping directly from the bag to avoid dense, dry cookies.
- Don’t overmix: Mix just until the dough starts coming together to keep your cookies tender, not tough.
- Chill the dough if possible: This step isn’t mandatory but helps the cookies hold their shape and develop a better texture.
- Use parchment paper or silicone mats: This prevents sticking and makes cleanup so much easier.
- Cool cookies on the baking sheet: Letting them rest before transferring helps them set up without breaking apart.
If you’re curious about other quick and cozy recipes, the Cozy Creamy Tortellini Soup is a comforting meal that comes together just as easily and is perfect for chilly evenings.
How to Store Peanut Butter Butterfinger Cookies
Once you’ve baked these beauties, it’s important to store them properly to keep that fresh-from-the-oven taste:
- Room temperature: Store in an airtight container at room temperature for up to 4-5 days. Layer the cookies with parchment paper to prevent sticking.
- Refrigeration: If you want to keep them longer, you can refrigerate the cookies for up to 2 weeks. Just bring them back to room temperature before serving for the best texture.
- Freezing: These cookies freeze beautifully! Place them in a freezer-safe container or bag, separated by parchment paper, and freeze for up to 3 months. Thaw overnight at room temperature or warm gently in the microwave.
Storing cookies right can make all the difference, especially if you’re baking ahead for a party or gift-giving. For more ideas on sweet treats to bake and share, you might want to explore the Easy No-Bake Martha Washington Candy recipe—it’s another crowd-pleaser that requires minimal effort.
FAQs
Can I use crunchy peanut butter instead of creamy?
Yes! Using crunchy peanut butter will add even more texture to your cookies, making them extra nutty and delightful.
Do I have to chill the dough?
Chilling is optional but recommended if you want thicker cookies. If you’re short on time, baking immediately will still yield delicious cookies.
Can I make these cookies gluten-free?
Absolutely! Substitute the all-purpose flour with a gluten-free flour blend that measures cup-for-cup. Make sure your baking powder and other ingredients are gluten-free as well.
How do I keep the Butterfinger pieces from melting too much?
Chopping the Butterfinger candy into larger chunks helps them hold their shape during baking. Also, folding them in gently and not overmixing the dough preserves their crunch.
There you have it—your guide to making unforgettable Peanut Butter Butterfinger Cookies. Whether you’re baking for yourself, family, or friends, these cookies bring that perfect balance of peanut butter richness and candy crunch that everyone will adore. And if you’re looking to round out your baking repertoire with more easy-to-love recipes, be sure to browse through the recipes at FoodTD, where you’ll find everything from cozy dinners to delightful desserts.
Happy baking, my friend! Don’t forget to share your cookie creations and keep the sweet moments coming.
For even more delicious inspiration, follow us on Pinterest and discover a world of tasty ideas to try next!
Peanut Butter Butterfinger Cookies
Ingredients
Equipment
Method
- Step 1: Beat the softened butter in a large mixing bowl until smooth and creamy. Add granulated sugar and light brown sugar, beating for about 2 minutes until light and fluffy. Scrape down the sides of the bowl.
- Step 2: Add creamy peanut butter and beat until fully combined with the butter and sugars. Crack in the egg and pour in vanilla extract, mixing until the batter is smooth. Scrape down the bowl again.
- Step 3: Spoon all-purpose flour over the wet mixture. Sprinkle baking soda, baking powder, and kosher salt evenly on top. Gently stir with a spatula or wooden spoon to distribute the dry ingredients before mixing.
- Step 4: Mix on low speed just until the dough starts to come together, leaving some flour streaks is okay. Stop the mixer and scrape down the bowl to ensure even mixing.
- Step 5: Fold chopped Butterfinger candy into the dough gently with a spatula to evenly distribute without crushing the pieces.
- Step 6 (Optional): Cover and refrigerate dough for 30-60 minutes to help cookies stay thick and chewy. You can skip this step if pressed for time.
- Step 7: Preheat oven to 350°F (175°C). Line two baking sheets with parchment paper.
- Step 8: Using a large cookie scoop (about 2 tablespoons), scoop dough balls onto baking sheets, spacing about 2 inches apart to allow spreading.
- Step 9: Bake each sheet in the oven center for 10-12 minutes until edges are set and just golden, centers remain soft and slightly underbaked for chewy texture.
- Step 10: Let cookies cool on the baking sheet for at least 10 minutes before transferring to a wire rack to cool completely. Optionally press cookies gently while warm or sprinkle extra chopped Butterfinger pieces on top.